Blog

Comments, Likes and Reblogs

I made a few minor improvements to my custom tumblr theme last night, and the end result is that you can now comment on the stuff that I post here. Yay!

If you’re also on tumblr and you choose to like or reblog one of my posts then that shows up too. If you’re on the main page of the blog then a count appears just underneath the tags to the left of this text (assuming that there’s anything to count), and if you’ve clicked in to a post or followed a link from my twitter or elsewhere then there’s a more detailed listing of the tumblr love received toward the bottom of the page. This applies to both this blog and shrapnel, although shrapnel has no comments.

That being said, I haven’t made it easy to like, reblog or follow me. The specialised and complex nature of my exact setup (of course) means that the standard links for these functions that tumblr puts on the page don’t work, so I’ve turned them off altogether. Next on the to-do list is for me to bring them back, so watch out for that and show me some tumblr love when you see them.

Blog

Lessons Learned

Last week I facilitated a “lessons learned” session as part of wrapping a project that I’ve just completed. We gathered a lot of great feedback we can apply to future projects, and a lot of the positive comments around the management of this project were about flexibility.

For some reason, it brought to mind a scene from the movie Broken Arrow.

Vic Deakins:

“This is battle! And battle is a highly fluid situation. You plan on your contingencies, and I have. You keep your initiative, and I will.”

It’s maybe a bit too dramatic to draw too direct a parallel with what I do (my life is not, in fact, an action movie), but the point is certainly transferable between the worlds of nuclear terrorism and project management.

As a project manager you plan. You plan for everything you can think of, and these are often elaborate plans involving resource and people management, procurement, otherwise writing big cheques and spending somebody else’s money, and many other levels of detail. The most important thing you can plan for though is what you’re going to do when the plan falls apart.

You will deviate from your plan somehow. Hopefully it’s not in too big a way, and it may even be to everybody’s advantage to do so. For my project there was no show-stopping issue, just handful of small ones and a couple of details we didn’t foresee.

The positive feedback about the flexibility of the project and the project team was because we had a plan for our plans falling through.

Blog

SharePoint Development: Lesson 2

Welcome back to my series of posts on SharePoint development!

At the end of lesson one we’d used some basic HTML, javascript and jQuery skills to create a tool for calculating shipping costs, and we’re hosting the tool on our team SharePoint site so that everybody who needs it has access.

image

This is great and all, but as we noted – it doesn’t exactly feel like our tool is a part of SharePoint. That might be fine if we’d built something extremely complex where having it as a self-contained webapp of sorts made a lot of sense, but it seems wrong for our purposes.

What we need to do is somehow build the tool into the main page of our SharePoint site so our users don’t even have to think if they want to use it – it’s just right there waiting for them.

The Content Editor Web Part

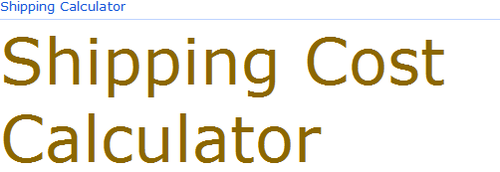
Believe it or not, we laid the groundwork for this in lesson 1 even without knowing it. The final step last time was to add a content editor web part to our page with a link to the tool in it.

image

The content editor webpart is much more powerful than that though, and we’ve barely scratched the surface. First, let’s take a closer look at what we have there already.

image

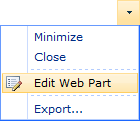
From the web part’s menu, choose the Edit Web Part option. An options pane will appear on the right of the screen.

If you’re using SharePoint 2007 there’s a button in the options pane called Source Editor, and this is where you’ll want to go. On SharePoint 2010 you’ll need to click into the web part first of all so that the ribbon appears at the top of the screen, then select HTML and Edit HTML Source from the Format Text ribbon.

Right now, my source looks like this:

​<a class="ms-rteFontSize-7" href="/web/shipping.aspx">Shipping Cost Calculator</a>

Simple enough, but hopefully you’re beginning to see where I’m going with this. The content of the web part is rendered inline as part of the HTML of the overall page, and we can put whatever we want in there. We can only edit this one snippet of the page where the web part lives, but that’s OK – it’s good enough.

Last time we included a reference to the jQuery library in the <head> section of the page, but does it actually need to be in the head? It may not be semantically great code, but we can put that reference anywhere. And once we have we’ll have all the power of jQuery at our disposal to manipulate the main page of the site however we see fit.

For now, let’s modify the code we used in lesson one to make it appropriate for inclusion in the middle of a page:

/web/js/jquery-1.11.0.min.js

   $(document).ready(function() {
      $('input#calculate').click(function() {
         var shippingcost = 19.99;
         
         if ($('input#itemweight').val() > 20) {
            shippingcost += (Math.ceil(($('input#itemweight').val() - 20) / 5) * 3);
         }
         
         $('span#shippingcost').html(shippingcost);
      });
   });

Item weight:
lbs

Shipping cost: $0

Paste that in to the content editor web part’s source, and save. On my installation of SharePoint 2010 a warning pops up telling me my HTML may have been edited. I don’t know why SharePoint feels the need to do this, but it doesn’t seem to matter.

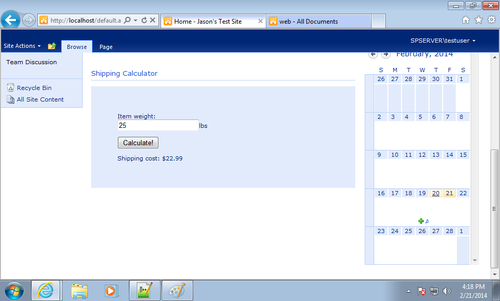
Our shipping cost calculator is now looks like it’s really a part of our site homepage, and we’re done another quick lesson!

image

Taking it Further

What we’ve done here is great for our purposes, but we’ve actually opened up a world of extra possibility here.

As I noted, the HTML and javascript we’ve pasted into our content editor web part goes directly into the page, inline. In some respects that’s not the best – we have script tags in the middle of the page which isn’t really the correct approach, but in other ways it’s extremely powerful.

We can use our script to manipulate the page however we choose. If the approach we’ve chosen to take is to include our code in a web part then we probably don’t want to go nuts and change everything, but if you want to manipulate, say, the document’s title? Easy!

document.title = 'Site Home and Shipping Calculator'

If you want to include a custom CSS file? Done!

$("head").append("<link rel='stylesheet' href='/web/css/example.css' type='text/css' media='screen'>");

And if you have another web part that you want to use jQuery in, there’s no need to include a second reference to the library – one per page is all you need. You can easily have one content editor web part that influences another.

Conclusion

So, in lesson one we built a simple tool and now in lesson two we’ve integrated it right into our SharePoint page. There’s a lot you can do with this knowledge. In lesson three we’ll go deeper still though, and begin to use data from SharePoint lists in our tool with the help of the SPServices jQuery add-on.

Blog

Be Your Own Boss (Without Quitting Your Job)

Many people dream of being their own boss. You’ve probably encountered a good number of them in your lifetime, and you may well work with several of them right now. They seem to be especially prevalent amongst the professional peers I work on projects with, and more so still on the IT side where a lot of the project managers and business analysts I work with are actually contractors who are their own boss.

People have this dream for many reasons. Some are extremely valid, like a desire to increase your project experience by working on projects for multiple organizations across different industries, but there seems to be a lot of people who want to be their own boss just so they can escape their existing tyrannical boss, long hours, and unmanageable workload.

These people are wrong.

The problems they’re trying to escape are brought about by their approach to work, and the unfortunate other side of that double-edged sword is that if they’ve been unable to change their approach, they won’t do well as their own boss either.

First of all, let’s consider this:

I don’t have a boss, I have a leader. I’m lucky in that I have a great one, but leadership as a discipline, a science, an art, and a skillset is hardly a new idea, so frankly if the person above you in the org-chart isn’t one then you probably should escape. You don’t need direct reports to be a leader and if that individual didn’t develop leadership attributes before they got some (you) then that’s a problem.

My boss, by most of the definitions of the word, is already me.

As usual, what I’m talking about here is ROWE – the results only work environment.

The third of the 13 ROWE guideposts is “every day feels like a Saturday,” and the ROWE book has this to say about it:

This is how entrepreneurs and freelancers live. Talk to successful self-employed people and they will describe days that are full but not hectic, that mix personal with professional in a way that is almost seamless.

Thinking like an entrepreneur (or acting like I’m my own boss, if you’d prefer to put it that way) has become very important to the way that I work, especially if I’m particularly busy like I was last week.

If you’re talking about the old-school working environment of old then you’re answerable to your boss for your actions – not just what you do, but how you do it. That’s why being your own boss is so attractive to people if they’re unfortunate enough to be in that situation.

If you’re self-employed then you’re answerable only for your output – what you do – although you are answerable in a big way because your livelihood depends upon it. You’re answerable to yourself, to your customers, and to your employees if you have any.

I, too, am answerable only for my output, and guess what? My livelihood depends upon it too. If my output isn’t up to scratch I get fired, and so I should. Sure, there’s somebody above me on the org-chart and that might be who I’m primarily answerable to (or at least that’s who would do any firing that proved necessary), but that really makes no difference. I have all of the freedom of being an entrepreneur coupled with all the benefits that come from being part of a large organization with great leaders to support and guide me.

Why would I want it any other way?

Blog

SharePoint Development: Tools of the Trade

As I noted in my last post, lesson two of my SharePoint development series is still nothing more than an item in the “someday” section of my to-do list at the moment, but in the meantime I thought I’d share a few tools that I find invaluable when I’m doing SharePoint development work.

  • Notepad++
    Any good text editor with a focus on code will do, but Notepad++ is my tool of choice, not least because it’s available in a portable version that I can run on my work computer without having to ask our IT department to install anything for me (not that I would ever run unapproved software, obviously. I’m just saying you could).
  • SPServices jQuery Library
    I’ll be introducing this little gem in lesson 3, if/when I get around to writing it.
  • Find List and View GUIDs
    SharePoint lists and views all have unique IDs assigned to them by the system, and it’s useful (again, for reasons that will become clear later) to be able to find them. This simple tool does just that.
  • SharePoint List Item Editor
    Another simple but extremely useful tool. This one presents lists in a grid view which is great for mass-editing, copying and pasting from Excel, etc, etc.

Enjoy!

Update:

I’d previously also listed SharePoint CAML Query Helper in this list, with the caveat that I hadn’t actually tried it but screenshots I’d seen made me hopeful that it would make the process of building CAML queries (which are the method by which you can control what data from a list is returned to you when you’re using SPServices) easier.

It’s is a worthwhile tool to have in your toolbox and it’s great for testing CAML queries, but it didn’t make building them as easy as I’d hoped.

What I want is a tool that lets me select a list field, enter the criteria by which I want to filter on that field, and then spits out the CAML query that I need to use. If anybody knows of such a tool please let me know in the comments!

Blog

Multitasking

It’s a common belief that women are better multitaskers than men, although I don’t know that’s really true.

For one, for every study (like the one reported on in the link above) that says they are, there are two that say it isn’t. More to the point though, I don’t actually believe that true multitasking exists.

You may well be able to two things at the same time, like talking on the phone while you drive, but I don’t believe anybody has the capacity to think about two things at once. That’s why people talking on the phone while they drive smash into things so often.

Multitasking as we know it, then, is all about switching your brain quickly from one train of thought to another in much the same way as a computer presents the illusion of multitasking by running two things at once. And I like to think I’m pretty good at it. Usually.

Last week I went to work on something I was especially excited about. There was a lot of effort involved, but I got two weeks worth of work done in five and a half days only because I was so enthusiastic about what I was doing – and as a result I didn’t really work on anything else.

So what’s my point? If you’re waiting for the next post in my SharePoint development series then that’s why you’re still waiting. I have some other post topics I have vague plans for too, but for the time being you’ll just have to wait some more. I have work I should have done last week to catch up on.

Blog

SharePoint Development: Lesson 1

Welcome to lesson 1 of my mini-series on SharePoint development! This is the first post where we really dive in and get our hands dirty, although I did previously write about installing SharePoint in a Virtual Machine. Anyway, I’ve been threatening to write about this stuff for quite some time now, so it’s probably about time I got started.

I’m going to assume as I write this that you already have at least a little familiarity with SharePoint and it’s capabilities, as well as some experience with HTML, javascript and jQuery. With these assumptions in place what I’m going to help you do is tie everything together to create some cool SharePoint-based tools, but don’t worry – we’re going to start off slowly.

SharePoint Document Libraries

Document libraries are a feature of SharePoint that you probably already know about. They’re a great way to store Microsoft Office documents that should be shared with a wider audience throughout a team or an organization. You can enable version control, and there are features to prevent clashes in situations where multiple users may try to work on the same document at once.

For our purposes we don’t care about most of that, but SharePoint document libraries can contain any type of file – not just office documents. For today, we’re going to use a document library simply as storage for an HTML document and the jQuery library, and we’re going to build a simple tool to calculate shipping costs. Over time we’re going to integrate this same tool more tightly into our SharePoint site, and begin to leverage more and more of SharePoint’s functionality.

But like I said, we’re starting slowly.

Creating a Document Library

Creating a new document library is a fairly simple affair. Some versions of SharePoint (2010 onward) have a shortcut for it in the Site Actions menu, but regardless of the version you’re running if you to Site Actions > View All Site Content and then hit the Create button you’ll find what you need. Select Document Library from the list of things that you can create.

Next, give the document library a name. It really doesn’t matter what you call it because we’re not going to send people to the document library itself – just to content within it. The name will feature in the URL of files that we store though, so for simplicity I’d recommend a name without any spaces. I always call mine “web,” but that’s just personal preference.

Under Display this document library on the Quick Launch? we’re going to select No. Choosing yes places a link to the library on the main page of the site, but as I noted – we don’t really want people to visit the library directly.

For Create a version each time you edit a file in this document library? you can select No here also – as we move through successive lessons in this series we’ll end up using the library only to store assets like scripts and images, so we don’t really need this feature. You can leave the Document Template drop-down at it’s default value – this setting won’t be relevant to us either.

Finally, hit the Create button at the bottom of the window.

image

The document library is now created. The first thing we’re going to do is create a folder for javascript files. Hit the New Folder button and create a folder called js. For today, this is the only folder we’re going to need. Download the jQuery library from the web, and upload the javascript file to the js folder.

Creating the HTML Page

I’m not going to dwell too much on this section because you can find much better tutorials out there for this than I could write, but I’m going to create a simple tool that asks for an item’s weight and then spits out a shipping cost.

For the sake of the example, I’m going to calculate shipping costs as follows: costs are $19.99 for anything up to 20lbs, and then an extra $3 per 5lbs (or part thereof) for anything heavier.

I’ve kept the code extremely simple with no error checking or any such niceties (in a real world tool you’d want to be more robust), and here it is:

<!DOCTYPE html>
<html>
<head>
   <title>Shipping Cost Calculator</title>
   /web/js/jquery-1.11.0.min.js
   
      $(document).ready(function() {
         $('input#calculate').click(function() {
            var shippingcost = 19.99;
         
            if ($('input#itemweight').val() > 20) {
               shippingcost += (Math.ceil(($('input#itemweight').val() - 20) / 5) * 3);
            }
        
            $('span#shippingcost').html(shippingcost);
         });
      });
   
</head>
<body>
   <h1>Shipping Calculator</h1>
   

Item weight:
lbs

Shipping cost: $0

</body> </html>

The only really notable part here is that we’re linking to the javascript file we uploaded earlier:

/web/js/jquery-1.11.0.min.js

Save the file as shipping.aspx, upload it to the root of the web document library, and that’s pretty much it!

Why the “aspx” File Extension?

On SharePoint 2007 and earlier linking to an html file in a document library will open the file (which is what we want to happen), but on 2010 onward the file will be downloaded instead. Using the aspx file extension solves this problem.

Linking to the Tool

OK, so we’ve created a useful tool and we’ve made it available on SharePoint, but it’s in a document library that’s hidden from view – a typical user would never find it.

So how do we make this available to a wider audience? Well there are several ways, but I’m going to add a new webpart to the main page of my SharePoint site and put a big, bold link in it.

Back on the main page of our SharePoint site choose Edit Page from the Site Actions menu and click the Add a Web Part button. We’re going to add a Content Editor webpart. You’ll get a word-style editor where you can insert text, images, tables, etc… and crucially links. I’m going to insert a link to the HTML file we’ve just uploaded, and increase the font size to make it stand out on the page. If you’ve been following along exactly then the address of the uploaded file will be /web/shipping.aspx.

You’ll probably also want to go to the Appearance section of the webpart properties and give it a custom title.

image

Conclusion

So, we’ve built a simple webpage with some javascript in there to calculate things for us and we’ve deployed it SharePoint, making it available to site visitors. This is great and all, but it doesn’t really feel like the page is a part of SharePoint. It doesn’t look or feel the same, and from a user experience point of view it seems as though we’re leaving the SharePoint site when we use our calculator tool.

That’s OK though! Today was just about getting started. In part two we’ll take the functionality we’ve just built and integrate it much more tightly into SharePoint itself. Stay tuned!