For a while now I’ve been vaguely threatening to write a post or two about my work with SharePoint, but so far I haven’t actually managed to get around to it.
The reason is essentially simple: SharePoint is a huge tool my company makes available to me, and everybody else that works there. They installed and maintain it on their servers, and I am but a lowly user.
That’s fine. The whole point of the development work I do on top of SharePoint is that anybody could do it. I don’t need any special admin rights and I don’t need to get the technical guys involved. The problem is that when it comes to blogging about my work on SharePoint, all my work is on my company’s internal intranet. If I wanted a SharePoint site for testing purposes I’d have to put a request in and I’m not sure it would be approved, I don’t want to build test things on an existing site, and I certainly don’t want to risk accidentally revealing some proprietary information in a screenshot or something.
So, I’m going to install my own copy of SharePoint in a virtual machine and take you through it in this blog post.
Wait, what? Why?
SharePoint server is a big, enterprise-grade tool that powers intranet and internet sites across the world. Why would I want to install it at home? Well aside from using it to blog about my work, I plan on using it to help me work.
When I develop new SharePoint tools for my job I keep then hidden at the start. It’s kind of a security-through-obscurity type deal, and even though I’m typically developing on a live site your average SharePoint user won’t find what you’re working on if there isn’t a link to it on their screen. This is great when you’re launching new things, but if you want to update a tool that’s already been rolled out and is in use it presents some challenges. What do you do in this situation? The choices are either to create an entirely new version of the tool and possibly a duplicate of the data that powers it, or just bite the bullet and make changes to the live production code. I’d rather have my own sandbox environment I can play in without fear of breaking something.
Isn’t SharePoint server expensive?
Yes. But also no! There’s a version called SharePoint Foundation that Microsoft makes available for free, and it’s perfect for our needs. It’s designed to run on Windows Server 2008 or 2012, but it can also be installed on 64-bit versions of Vista or Windows 7, which is what I’m going to do.
Why a virtual machine?
To setup SharePoint server you do need to install some pre-requisites and change some operating system options, and I don’t want to do that on my desktop computer.
OK, I’m in. Let’s go!
Great!
Start by downloading and installing some virtualization software. My environment of choice is VirtualBox so that’s what I’m going to be using. If you don’t have an existing preference for something else, then I’d recommend you do the same.
Creating the VirtualBox VM
- Open VirtualBox and hit the new button in the top left
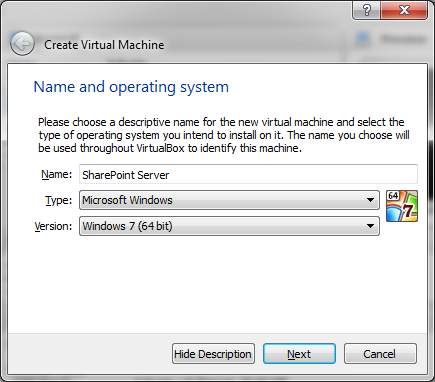
- Give your virtual machine a name, select the correct OS type (Microsoft Windows) and version (Windows 7 64 Bit), and hit next.
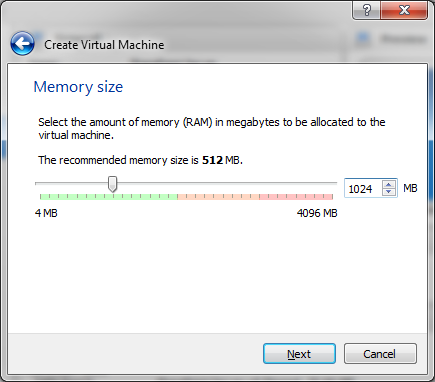
- Set the VM’s memory size. Microsoft says SharePoint foundation requires 4gb of RAM. In a bold decision that may come back to bite me later on, I’m going to give it 1gb.
- Complete the remainder of the VM provisioning with the default options. You’ll end up with a 25gb virtual hard drive, but it’s dynamically sized so it won’t take up 25gb of your real-life hard drive.
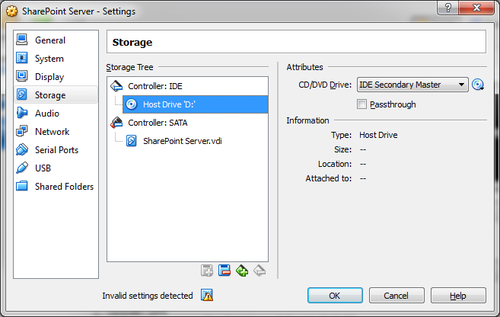
- Your now back to the main VirtualBox window, and your virtual machine has been created – but is empty. It’s time to install Windows 7. Right-click your new virtual machine at the left of the VirtualBox window, go to the storage tab, select the DVD drive and click the little disc icon on the far-right of the window to point the virtual drive to the Windows 7 install media. This could be a physical disc in your drive, or an ISO disc image.
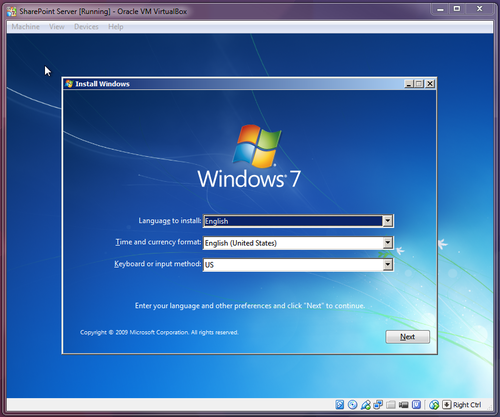
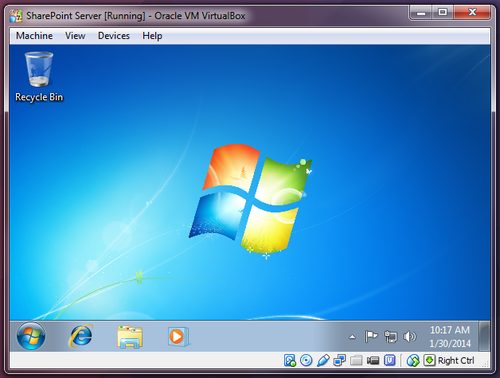
- Back at the main VirtualBox window, hit the start button up top. The virtual machine will open, and the windows install will begin. I’m not going to take you through all the install steps, but it’s no different to installing Windows 7 on a real computer. When you create a user you can call it whatever you want, but you must set a password.
Installing prerequisites and configuring windows
Now that we have Windows 7 installed and running in our virtual machine, it’s time to install a few prerequisites before we dive into installing SharePoint itself.
If you’ve already downloaded SharePoint Foundation then you may have noticed it includes an option entitled Install Prerequisites. Bad news – this only works on Windows Server and not Windows 7 or Vista, so you have some work to do.
You’ll need to download and install:
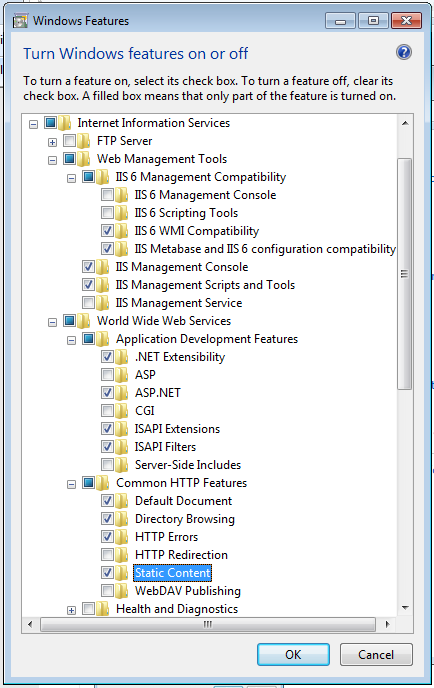
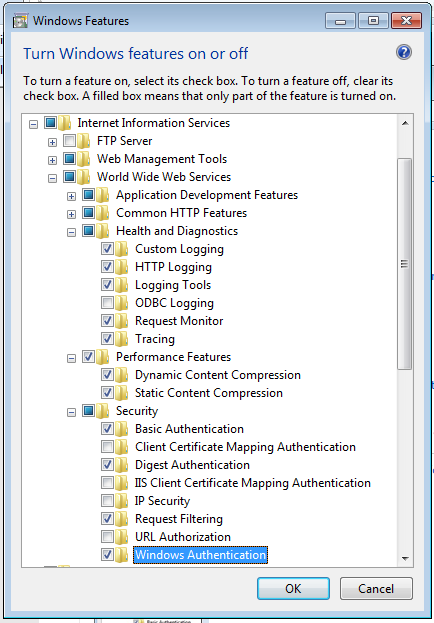
Next, we need to set a few options in the operating system. Open up control panel and go to Turn Windows features on or off.
Here are the options we’re going to set:
Time to install SharePoint
Finally, we’re ready!
- If you haven’t done so already, download SharePoint Foundation 2010 from Microsoft’s website. Make sure you save the file rather than running it, because…
- …running it doesn’t work. As I noted, SharePoint is designed to be a server application available to large groups of people, and it requires Windows Server as a result. Except it doesn’t. Read on.

- What we need to do is manually unpack the installation file, and change a setting before we can install.
- Move the downloaded file into a folder somewhere (on your desktop is fine), open a command prompt, and navigate to that folder.
- Type the following command, and extract the files from the archive into the same folder
SharePoint_SP2_en-us /extract

- The installation files are now extracted into the folder. Navigate to the FilesSetup folder. There’s a file in there called config.xml. Open this with a text editor (notepad is fine)
- Inside the <Configuration> tag, paste the following line:
<Setting id=”AllowWindowsClientInstall” Value=”True” />
Save and close the file, and navigate back to the root of the folder you created.
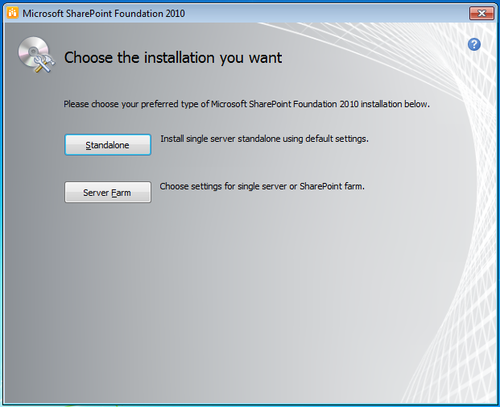
- Run setup.exe by double-clicking, and we’re pretty much good to go! When asked to choose the installation you want, make sure you select Standalone
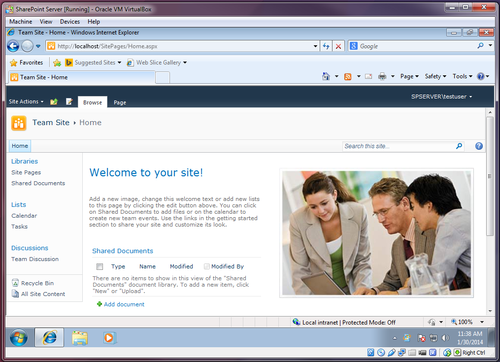
It may take a while, but if you’ve followed all the steps correctly, SharePoint Foundation 2010 will now install correctly. The final step of the installation is a configuration wizard. Don’t skip this step! Despite its name there are no options you need to select, but you do need to make sure that you run it. It will set everything up for you, and we’re done! When the configuration wizard is complete it will open the site automatically. You may need to log in with your windows username and password.