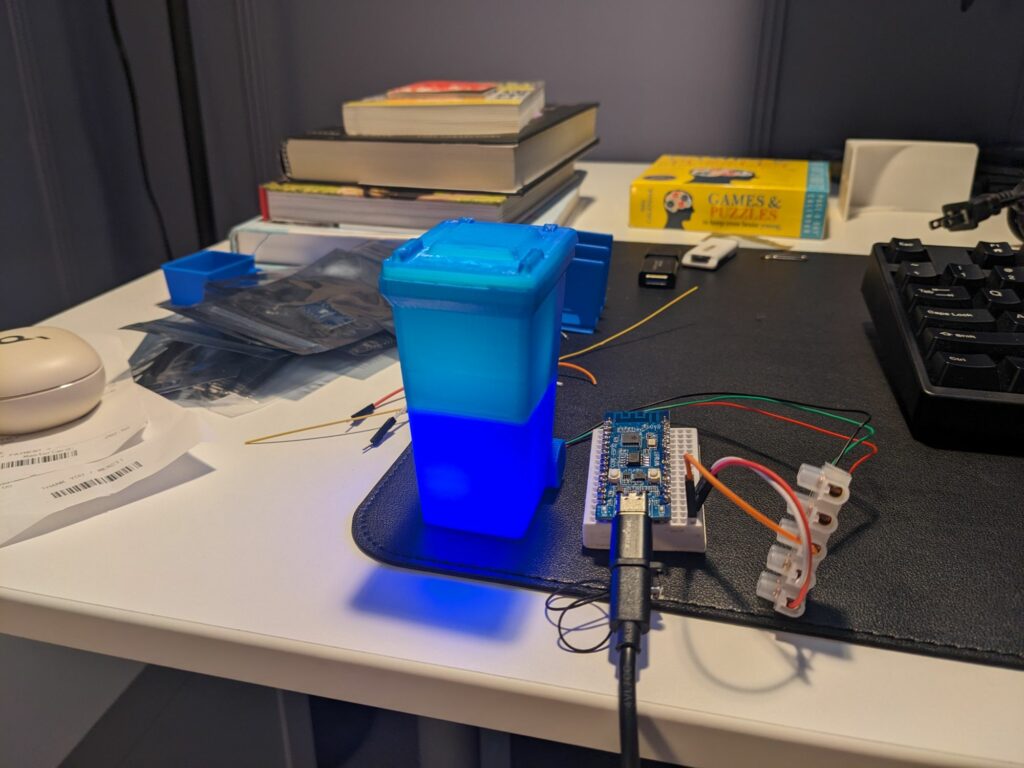
I originally thought I’d need to adjust the hole in the garbage can model to move it upward, but actually the key was putting the microcontroller into the bin with the port facing down.
It does need to be very slightly wider than it currently is, but on my test piece I did that a file and it’s looking good!
I was worried that only having two LEDs instead of four would result in it not being bright enough, but I’m running it at half brightness with my example code and it seems great.
Next steps are to find a way to fit the tiny microcontroller I’m going to use into the bottom so the USB port lines up for power, and of course print the bin in white.
Although I’m sticking fairly closely to the original design, there will be a couple of differences that inevitably are going to require modification.
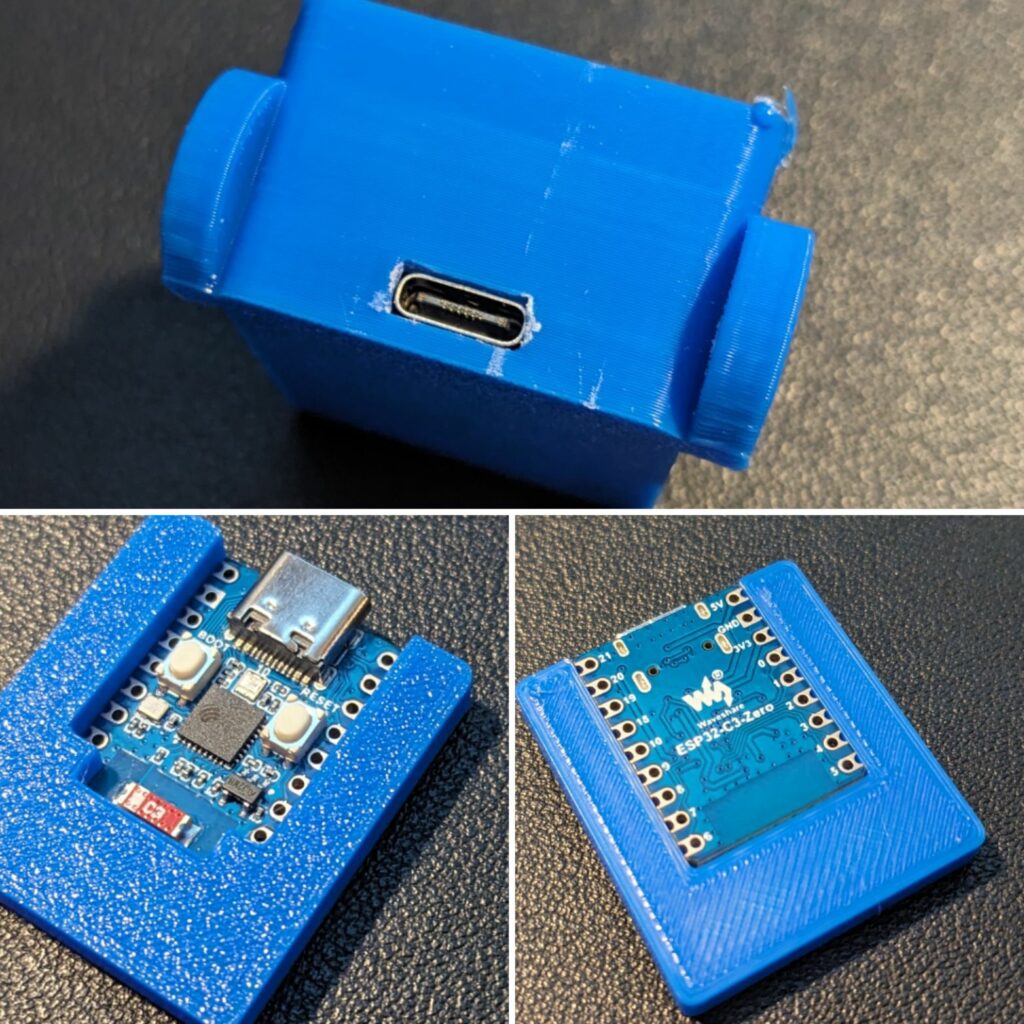
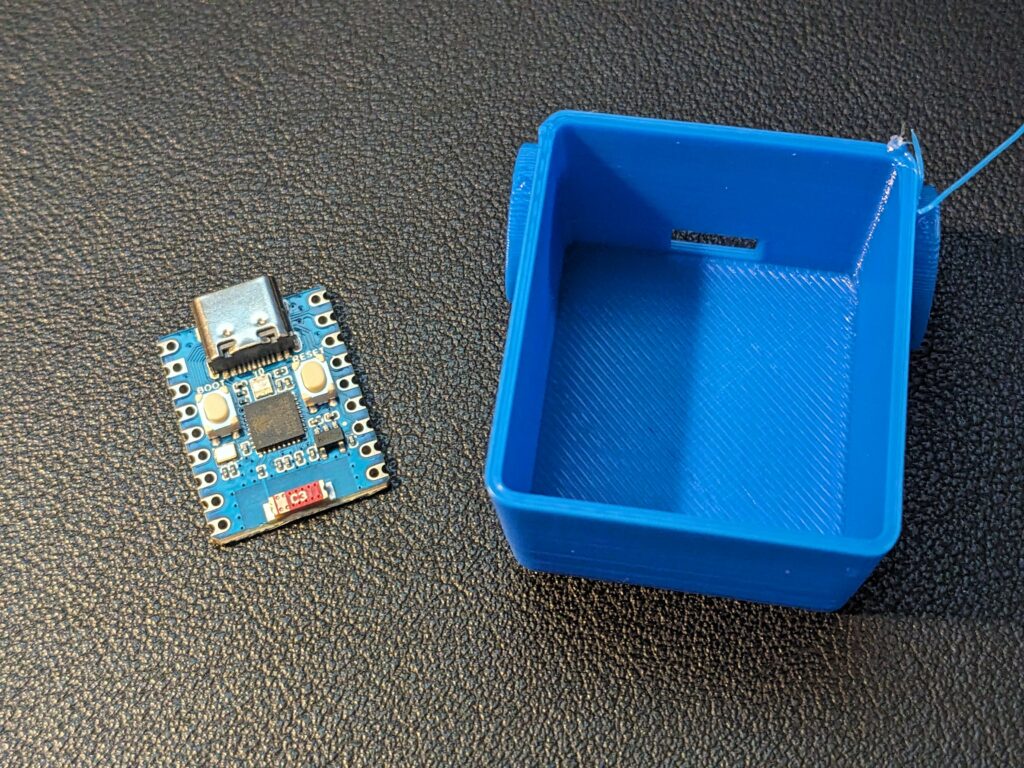
Firstly, the microcontroller itself. The original uses a Wemos D1 Mini which, as I understand it, the garbage can 3D model is designed around and it fits perfectly into the bottom of the bin. I’m using an ESP32-C3 Zero which is quite a bit smaller.
My plan here is to simply print a U-shaped support for the ESP32 that holds it in place, although I also already know that I’m going to need to to raise the cutout for the USB plug very slightly in order for it to align properly. It’s close already, and happily the hole is already an appropriate size for the USB-C connect my ESP32 uses despite having been designed for micro USB. I’m thinking that shouldn’t be too difficult to achieve, though.
The second change I hope to make is to the light source, although I’m not yet sure if my plan for that is flawed. The original design uses four individual RGB LED pixels. I’d prefer to use an offcut of an LED strip I already have lying around, but the problem is that the LEDs are much too far apart.
That said, the original design also divides the bin into four quadrants for the UK’s many different types of garbage, but where I live in Calgary there are only three garbage categories (general, recycling and organic waste) and at most two of those are collected on the same day. I’m therefore going to modify the light baffle from the original design and remove two of the three fins, splitting the bin into two chambers instead of the original four.
I’ve already done this part and made a quick modification to the original STL in Tinkercad, available here.
It remains to be seen if halving the number of LEDs will give me the level of brightness I want, but now that I have a modified baffle printed that’s the next part of the adventure, as I assemble a prototype. If it’s bright enough for my blue test print then it’ll definitely be bright enough for the finished product that I’ll be printing in white.
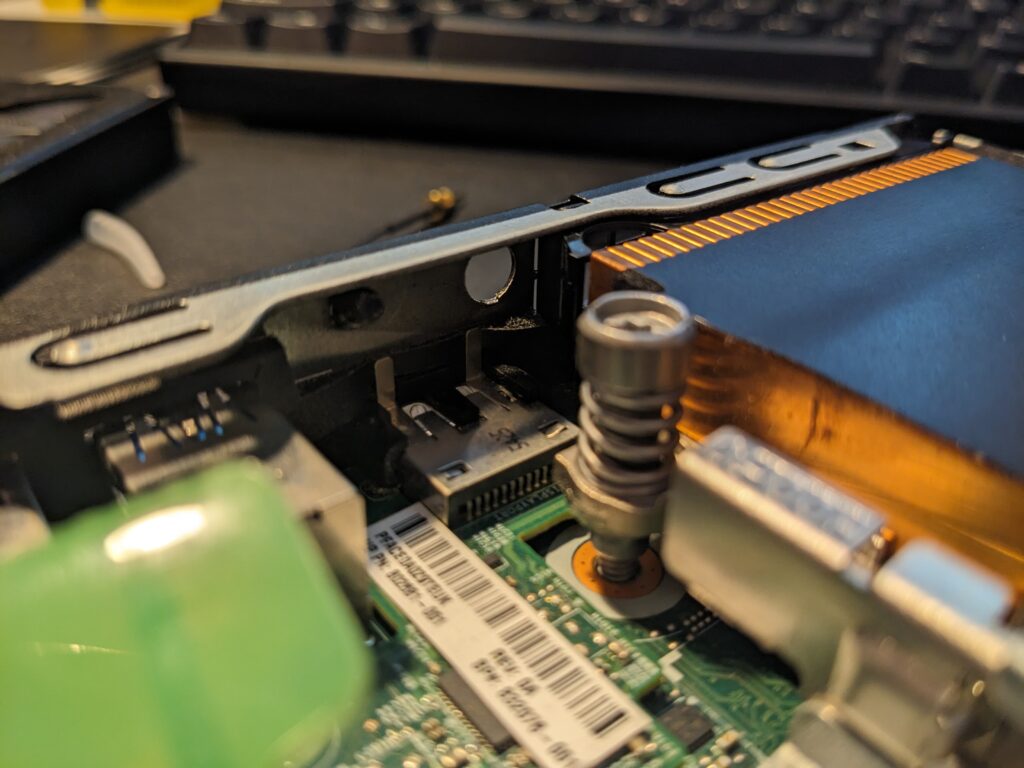
When we left of I’d managed to install Batocera on the internal SSD, but I really wanted to add WiFi and Bluetooth to the computer so I didn’t have to rely on ethernet and could use a wireless controller. I picked up an inexpensive M.2 WiFi card from Amazon and go to work installing it. Installing the card was incredibly straight forward – you remove the 2.5″ SSD, remove the tray the SSD sits on, and install the card in the slot you’ll find underneath. Installing the wireless antennae that I also bought was much more challenging: the computer has two cutouts where the antennae are supposed to go, but I have no idea how you’re supposed to use the one in the third picture because the CPU cooler is in the way.
Whatever, one’s enough.
At first boot after installing the card it didn’t work and I was initially concerned that there may be a hardware compatibility issue. Perhaps I should have sourced a model of WiFi card that would have originally come with the PC? Actually no – I just needed to go into the BIOS and enable M.2 WiFi and Bluetooth.
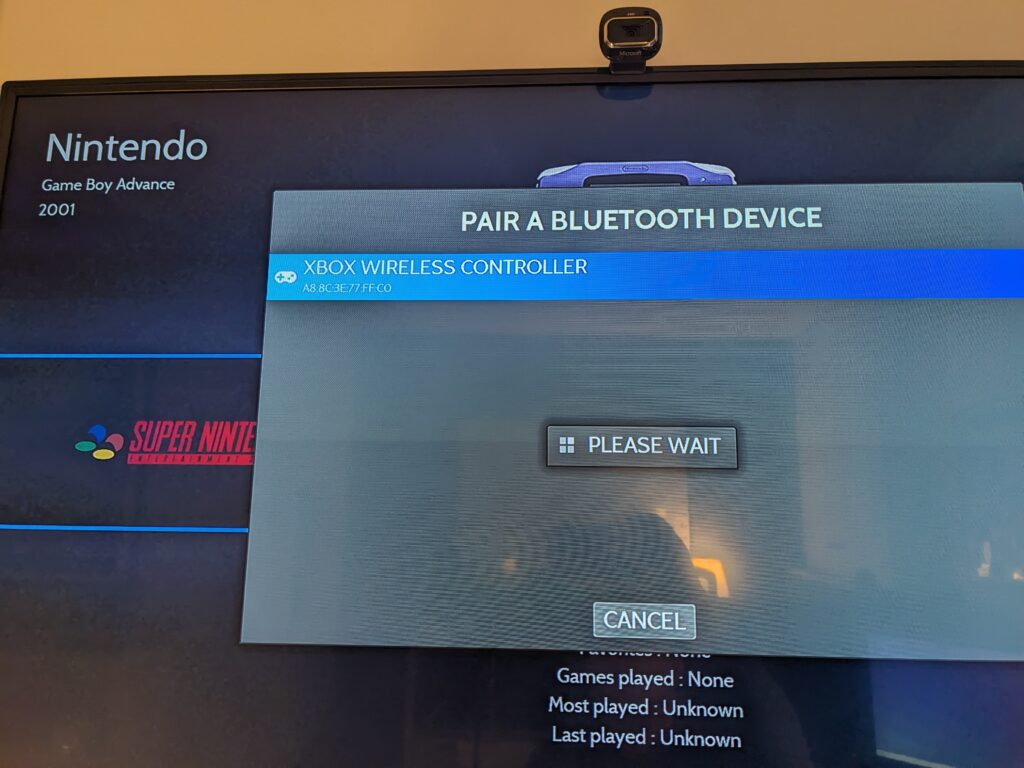
The next challenge was pairing my Xbox controller. I spent half an hour trying to pair the controller, then unpair and re-pair, but it just wasn’t working. When paired it would rapidly connect then disconnect then reconnect then disconnect, filling the screen with notifications. I spent a bit of time doing some Google-based research but all I discovered was that I shouldn’t be experiencing any problems, so I put it aside and instead paired another Bluetooth game controller I had lying around, an Evoretro switch pro controller. This one worked great.
That evening as I was lying in bed the thought occurred to me that I should maybe try changing the batteries in the Xbox controller so the next morning I gave that a go and it fixed all my issues. I did take 10 minutes to plug the controller into my PC and update the firmware on it too, for good measure.
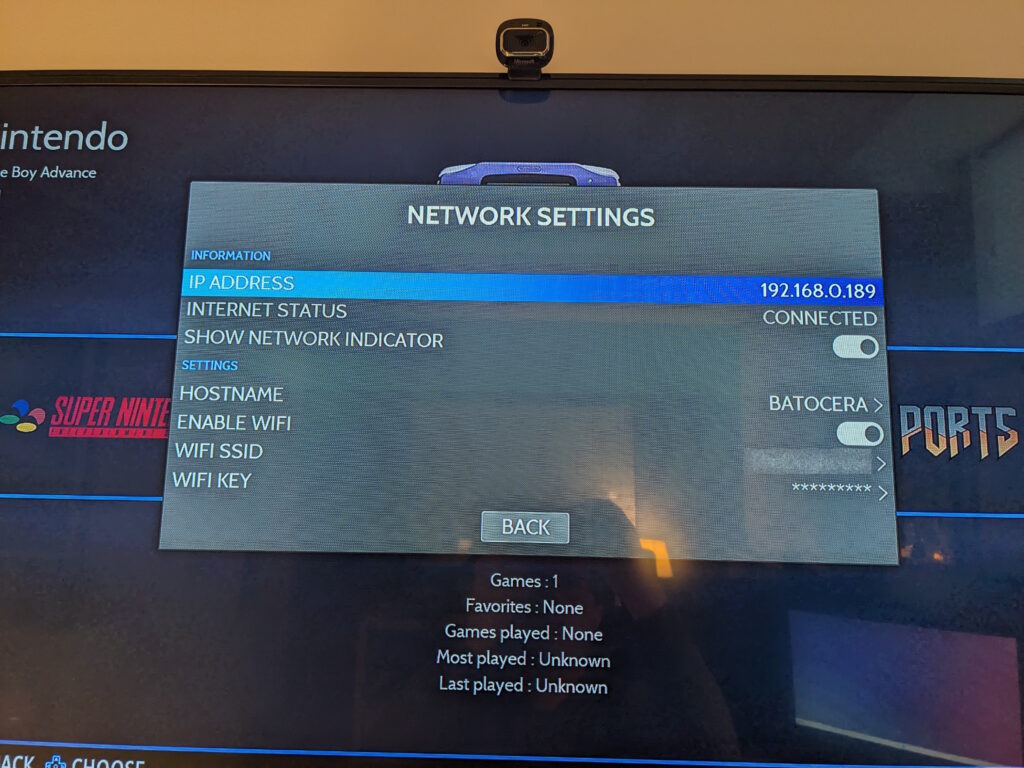
Everything else has been smooth sailing! Batocera automatically shares its storage over Samba so I connected to it using my Windows PC and copied over the game backups I have. The folder structure is important, but also pretty intuitive. I read a headline that indicated that it may be possible to store the games on a network share, which in this house would give me a potential 30TB of game storage. For now I’m sticking to the SSD in the PC.
By default games run in their native aspect ratio (4:3 for most of the ones I’m playing). Generally they look just fine if you stretch them to 16:9, so that’s what I’ve done, and I turned off the bezel artwork by disabling “decoration” under the game options in the main menu.
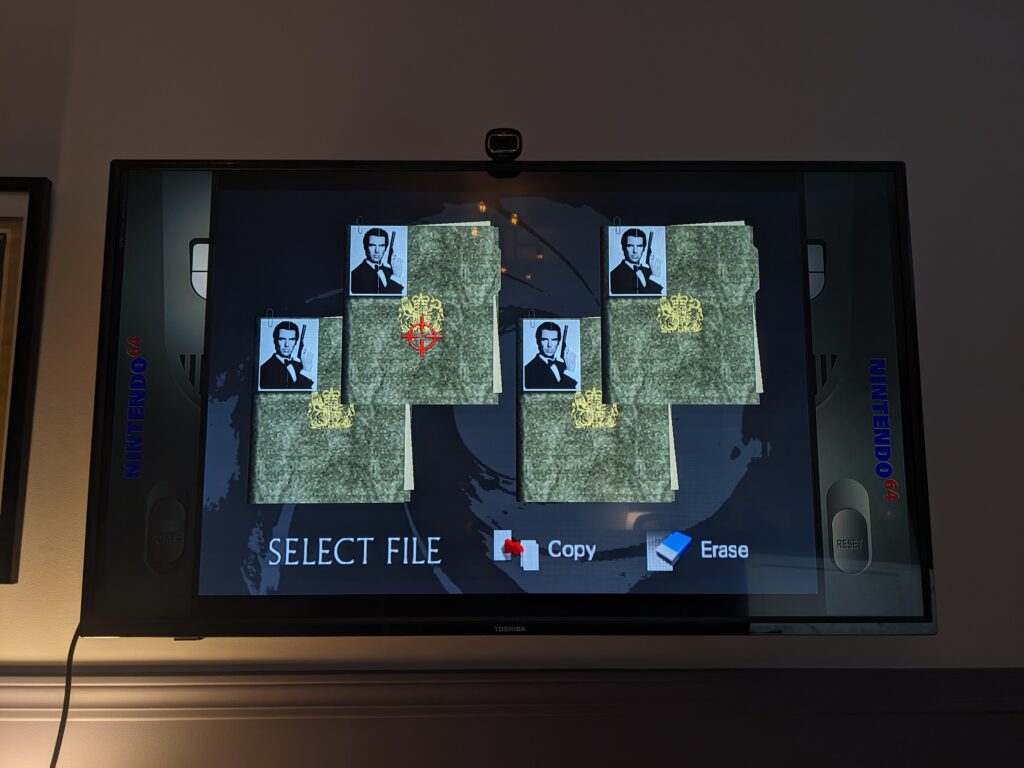
And it’s as easy as that! I spent a pleasant Friday afternoon hour playing GoldenEye N64.
The only question that remains is where do I put this thing? Right now I have it hooked up to the TV in my office but I want a more comfortable environment. Should it go in the family room under the main TV, or should it go in the basement hooked to the projector? Let me know!
While I await a few parts (specifically the microcontroller) for my bindicator project, I’ve kicked off another project that’s been on my to-do list for some time – turning a spare mini PC I have sitting around into a retro gaming and emulation machine.
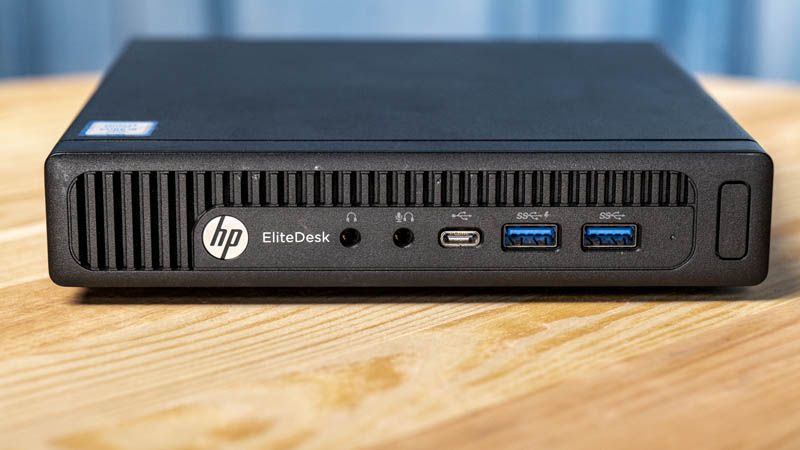
Until the end of last year I was using this HP EliteDesk 800 G2 in the workshop half of my home office, but I’ve since shuffled things around a little bit and it’s been sitting idle for a couple of months.
I’ve installed Batocera on it which was a chore, because there is no installer – I had to write the disk image to a USB stick, boot from that, then re-download and re-write the same disk image to the internal drive.
The version of the PC I have doesn’t have WiFi or Bluetooth but it does have a M.2 slot available for a card that provides both so I’ve ordered one of those, necessary partly because I want to use an Xbox controller with this setup and partly because I’m not sure exactly where I’ll be putting it and whether there’ll be ethernet there.
My plan is to backup a whole bunch of my old console games and use the emulators from Batocera to play them on them. I’d really like it if I’m able to get some cloud game streaming working on this so I can play some Xbox cloud games. I have no idea if that’s doable, but we’ll find out together.
This is my first time trying out Batocera, so if you have any hints, tips or advice (or alternative OSes I should be using instead) let me know!
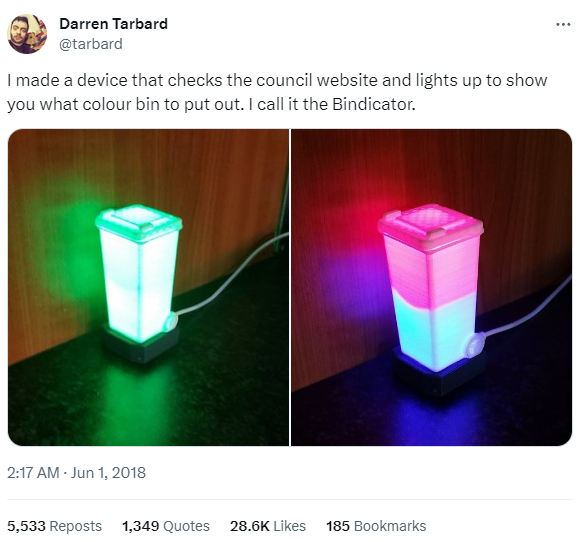
Somewhere around five years ago I saw a semi-viral tweet, and was immediately inspired.
In some ways I’ve been thinking about the #bindicator ever since. I’ve always loved electronics projects but I didn’t have the capabilities to make a bindicator of my own back then, so I started with the software: the City of Calgary makes their garbage schedule available in iCal format through an API and I’d been subscribed to it via Google Calendar for some time. It wasn’t a difficult task to write a little bit of code to create a sensor in @[email protected] that tells me which carts need to go out that day, and from there it’s even more trivial to craft an automation that sends us each a notification at 7pm the evening before the garbage needs to go out.
This is nice and all, but the idea of a bindacator of my own never really went away, and now that I can do my own #3Dprinting, now’s the time!
There are plenty of articles online about how to make this and the original creator has two-part YouTube series that walks us all through it, so I think it might be the perfect first project for combining my new 3D printing capabilities with my aforementioned affinity for little electronics projects.
I don’t 100% know where to start because the microcontroller that I’ve ordered isn’t the exact same one used in the original build, and rather than four individual LEDs my plan is to simply use four LEDs from the end of a spare light strip I have lying around and I’m not certain whether these will fit nicely into the existing 3D model or whether it’ll need some modification to make everything fit (and if it needs modifying – I don’t know yet how to do that).
So in the absence of a solid plan I’ve opted to get started by getting started. As I write this the 3D model is printing in the other room and @[email protected] tells me it has an hour to go. I don’t know that this will be a quick project because I expect to learn a lot as I go, but I will keep you all up to date on how I get on!