Somewhere around five years ago I saw a semi-viral tweet, and was immediately inspired.
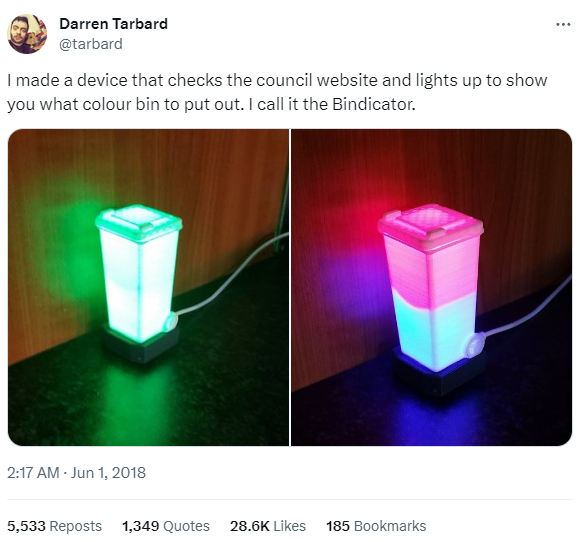
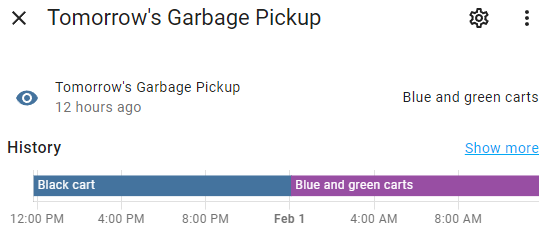
In some ways I’ve been thinking about the #bindicator ever since. I’ve always loved electronics projects but I didn’t have the capabilities to make a bindicator of my own back then, so I started with the software: the City of Calgary makes their garbage schedule available in iCal format through an API and I’d been subscribed to it via Google Calendar for some time. It wasn’t a difficult task to write a little bit of code to create a sensor in @[email protected] that tells me which carts need to go out that day, and from there it’s even more trivial to craft an automation that sends us each a notification at 7pm the evening before the garbage needs to go out.
This is nice and all, but the idea of a bindacator of my own never really went away, and now that I can do my own #3Dprinting, now’s the time!
There are plenty of articles online about how to make this and the original creator has two-part YouTube series that walks us all through it, so I think it might be the perfect first project for combining my new 3D printing capabilities with my aforementioned affinity for little electronics projects.
I don’t 100% know where to start because the microcontroller that I’ve ordered isn’t the exact same one used in the original build, and rather than four individual LEDs my plan is to simply use four LEDs from the end of a spare light strip I have lying around and I’m not certain whether these will fit nicely into the existing 3D model or whether it’ll need some modification to make everything fit (and if it needs modifying – I don’t know yet how to do that).

So in the absence of a solid plan I’ve opted to get started by getting started. As I write this the 3D model is printing in the other room and @[email protected] tells me it has an hour to go. I don’t know that this will be a quick project because I expect to learn a lot as I go, but I will keep you all up to date on how I get on!
2 thoughts on “Making My Own Bindicator”