Today I picked up a Pi 4 and a Pi Zero 2 W for other projects (watch this space!) and I was curious how they’d perform. So I raced them. From the time I press the “power on” button on my TV remote to the time they’re displaying a webpage.
Device
Time
Raspberry Pi 3B+
1:05
Raspberry Pi Zero 2 W
1:25 (+20 secs)
Raspberry Pi 4B (4gb)
0:49 (-16 secs)
This is not super-scientific. I think the 3B+ is usually faster except it took longer than usual to obtain an IP address during its boot process. 🤷🏻♂️
What was most interesting to me was the differences between the 3B+ and the Zero 2W: the initial parts of the Zero’s boot process were quicker than the 3B+, but as soon as it got into dealing with graphics and opening the browser it slowed down dramatically. Even changing from one screen to another in my dashboard and reloading page elements were slow enough that I would need to change my dashboard layout. It really wasn’t performant enough for what I’m doing.
The Pi 4, unsurprisingly, performed great – although the difference between the 3B+ and the 4 wasn’t as big as I thought it would be. The Pi 4 is also too power hungry to be powered by my TV’s USB port, which is a really nice feature of my setup.
Whether by luck or judgement, the setup I have is the one I’d recommend if you want to do something similar. I’m almost tempted to buy more Pi 3s in case I want to replicate it somewhere else in the house.
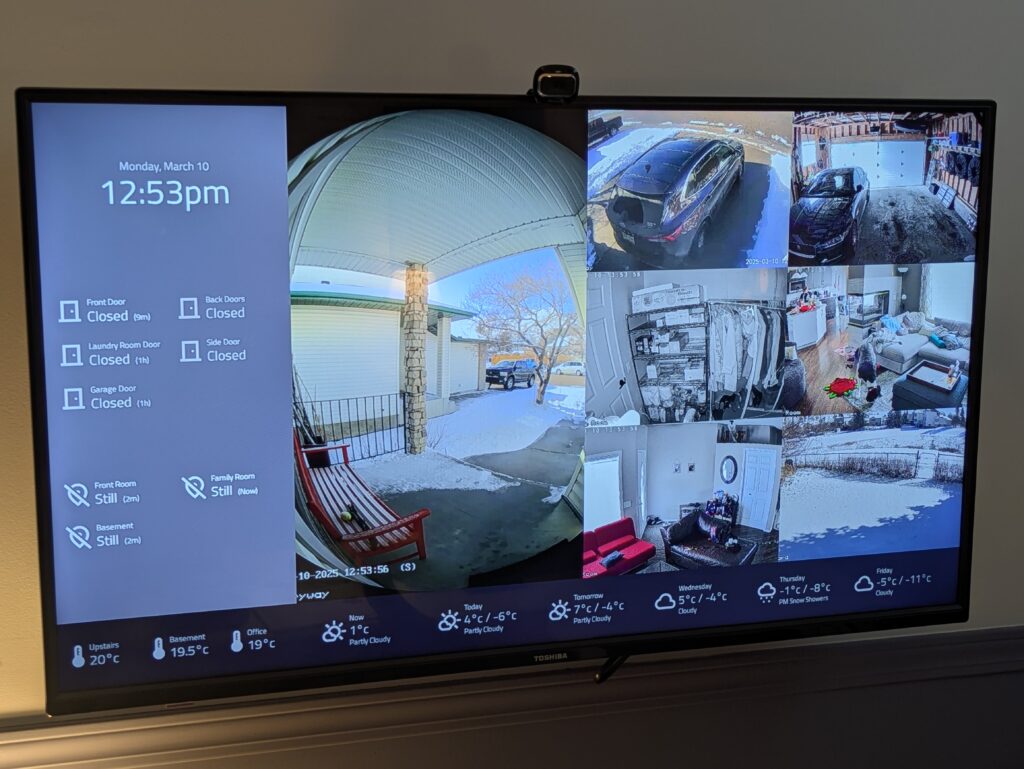
In my office I have a TV on the wall that shows me some pertinent info about what’s going on with our house (thanks to Home Assistant and our array of Smart Home sensors) and the weather, and rotates the display between my calendar, a Google Map with the local traffic overlay, and a view of our security cameras.
I’ve had it for many years and I set it up by (mostly) following a 2016 guide.
The whole thing runs on a Raspberry Pi 3b which I love because I can power it using the USB port built into my TV. The low-power hardware makes optimization critical, hence why the Pi is set up with just enough software to run a lightweight web browser and nothing more.
I’ve recently been on a bit of a journey of switching to Linux for almost all my computing – more to come on that in a future post – which has led me to go through all my devices one by one and get them set up the way I wanted. That inspired me to take a crack at the office Pi too.
It was working just fine before I touched it so I wasn’t necessarily expecting to make any changes, but I thought it might be good to see if the software options identified nine years ago are still the most optimal.
No they’re not as it turns out, so here’s my updated guide on setting up a Raspberry Pi to display a web page (and nothing more, nothing less).
The Operating System
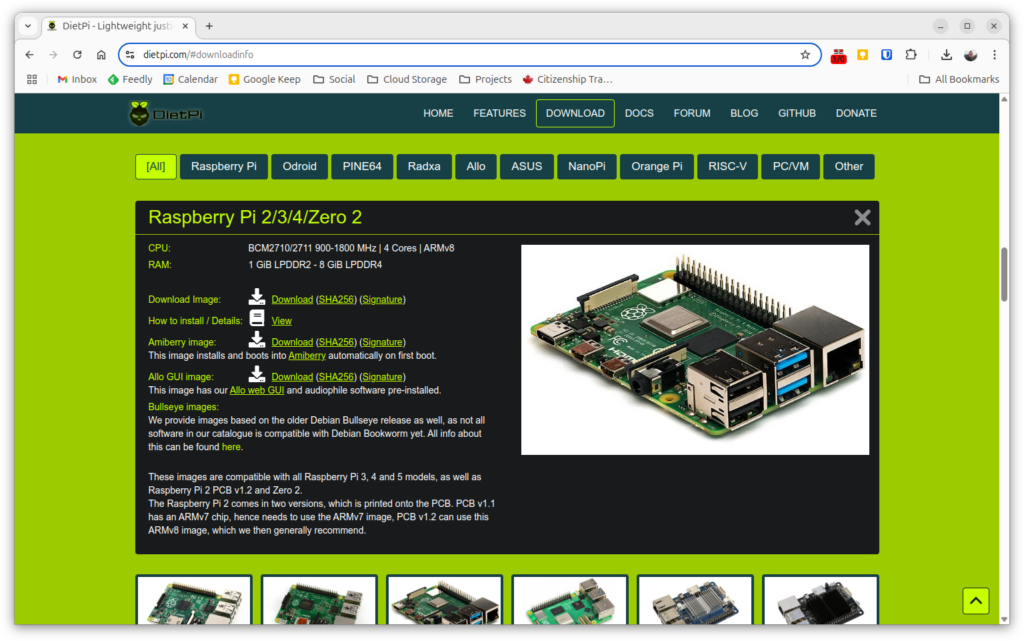
My first change was the base operating system. I switched to DietPi. Download the image for your particular device and install it. There are instructions on the DietPi site if you need them.
Work through the DietPi setup process that automatically launches when you first boot the drive and log in, in particular:
Set the localization options (keyboard layout, system locale, timezone)
Connect to the internet – in my case I used the Pi’s built-in WiFi – and optional but recommended: disable any connections you won’t be using (e.g. wired Ethernet) so they don’t slow the boot process
Enable SSH if you want it
Set autologin as root – generally it would be good practice not to use the superuser account for day to day operation and instead set up another account with only the privileges needed, but this setup is so basic we’re not going to worry about it
Don’t install any of the software packages – we’re going to carefully install only what we need
For some reason my networking settings didn’t take effect on first setup and I had to reboot and repeat that part of the setup by launching dietpi-config from the command line.
The Software
Our goal with the software we install is two-fold:
If we don’t absolutely need a piece of software, we’re not installing it
We want the software we are going to install to be as lightweight as possible
All we want to do is display a web page on a display. We don’t even really need users to interact with our system. To get this done we’re going to need an X server, a window manager, a web browser and couple of utilities to tie everything together. Let’s get it installed:
We’re using the X.Org X server, the dwm window manager and surf browser (both from suckless.org), and we’re installing unclutter to hide the mouse pointer when it isn’t in use.
Configuration
First we’re going to create a startup script: nano /root/startdisplay.sh
#!/bin/bash
# Disable DPMS (Energy Star) features.
xset -dpms
# Disable screen saver
xset s off
# Don't blank the video device
xset s noblank
# Allow quitting the X server with CTRL-ATL-Backspace
setxkbmap -option terminate:ctrl_alt_bksp
# Disable the mouse pointer
unclutter &
# Run window manager
dwm &
# Run browser in full-screen mode
surf -F https://www.google.com
Replace https://www.google.com above with the URL of your dashboard, then press Ctrl-O to save the file followed by Ctrl-X to exit nano. Next, make the script executable:
chmod +x /root/startdisplay.sh
Finally, edit /root/.bashrc and add the following three lines at the end:
if [ -z "${SSH_TTY}" ]; then
  xinit ~/startdisplay.sh
fi
This will start X and run our startdisplay script when the root user logs in directly to the device, but not if they’re logging in over SSH (where it wouldn’t work anyway).
And that’s it, done! Reboot your Pi and enjoy your display.
My Pi3B takes around 45 seconds from power on to the point where it’s displaying my dashboard web page, which is less than half the time the previous software setup took (the hardware has remained the same throughout).
The Exciting Conclusion
I’d love your feedback on all this. Is there an even more efficient setup I’m missing? I’d also love to hear about your use case.