Welcome back to my ongoing series on SharePoint development!
I promised last week that I’d follow up lesson three within a week, so here we are! In that previous lesson everything we did was in relation to setting the stage for what we’re going to tackle today, so I’ve got no doubt that you’ve been waiting with barely contained anticipation to get back to writing some code.
Because all the steps from last week were fairly standard SharePoint stuff, if you’re pretty familiar with the platform you may well have skimmed through it. That’s fine, but for everything we do today to be successful we’re going to need to make sure that:
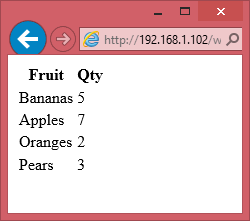
- We’ve created and populated a list of shipping prices, with different shipping profiles (in our example, these different profiles are based on destination).
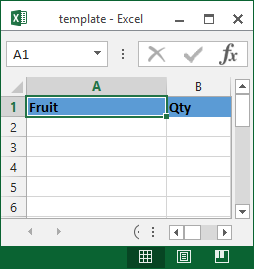
- Uploaded the SPServices library minified javascript to our “web” document library.
- Located and noted the GUID of the shipping prices list, so that we can programmatically reference it in our code.
With those steps done everything is in place, so let’s not waste any more time!
The HTML
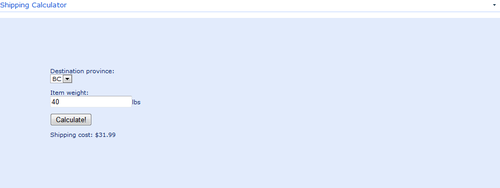
The HTML portion of our code hasn’t changed very much since we wrote it way back in lesson one, and it doesn’t change much today either. That being said, we do have an additional option that forms part of our calculation this time around, so we’ll add a form element for that.
   Destination province:

     Please wait, loading data...

   Item weight:

     lbs


   Shipping cost: $0
As you can see, we’ve added a drop-down menu that allows for the selection of the destination province. In the HTML it has a single entry in the list that says “Please wait, loading data…” As you might anticipate, we’re going to remove this option later on and replace it with the actual choices, but it’s probably good practice to have something there because the SPServices library is going to read from our list with an AJAX HTTP request – in other words the page will load first (with our “please wait” message), and the data to populate the list will be loaded afterwards. Hopefully it will all happen so fast that nobody ever really sees the “loading” message, but you never know.
The JavaScript
OK, now we’re really going to start getting into some changes in functionality! First things first, though. We need to include the external libraries we’re going to be using. jQuery has been there from the start of our journey, but SPServices is new for today.
/web/js/jquery-1.11.0.min.js
/web/js/jquery.SPServices-2014.01.min.js
The other thing I’m going to do at the beginning of my main block is declare a global variable in which to store list data. There are probably better approaches than this, but for the sake of keeping my code relatively simple this is one I’m taking.
var shippingData = false;
Loading Data from our SharePoint List
Next is where the SPServices magic happens. Immediately inside our jQuery document ready function we’re going to call SPServices and grab the data from our list, putting the result of that request inside our shippingData variable. SPServices has many available options that get passed as an object to its main function and more details can be found in the documentation on their website. Like I said though, I’m keeping things simple:
$().SPServices({
   operation: 'GetListItems',
   listName: '{4883AC18-E2A5-4EAF-8446-23B15B43861A}',
   completefunc: function(xData, Status) {
      if (Status == 'success' && ($(xData.responseXML).find('ErrorCode').text() == '0x00000000' || $(xData.responseXML).find('ErrorCode').text() == '')) {
         shippingData = $(xData.responseXML).SPFilterNode('z:row');
         populateDropdown();
      } else alert('Something went wrong!');
   }
});
Not bad, eh? Ten lines of code and we’ve read all the data from our SharePoint list. Let’s look at what we’ve done in a bit more detail.
The code we’ve written can be summarized as:
$().SPServices(obj);
All we’re doing is calling the SPServices plugin and passing in a javascript object that contains all the options it needs to understand what we want it to do. There are many options we could pass to it, and you’ll find more detailed documentation on the SPServices homepage. I’ve kept things as simple as possible and passed in the bare minimum.
Operation: ‘GetListItems’
In our example we’re dealing with items in a list. GetListItems is the operation we need to read data from a SharePoint list into our webapp. There are many other types of operation related to lists that SPServices could do for us – creating entirely new lists, adding or removing list fields, deleting lists, etc. Essentially almost anything you could do manually on SharePoint could be done programmatically with SPServices. If we wanted to write data back to a list then UpdateListItems would be the operation we’d use.
ListName: '{4883AC18-E2A5-4EAF-8446-23B15B43861A}'
The ListName parameter could take one of several formats. A simple string containing the name of the list will work, but to avoid any kind of confusion between similarly named lists my preference is to pass in the GUID of the list. Remember that the GUID of your list will be different to mine. SPServices can also take a WebURL parameter that tells it which site in your SharePoint collection the list can be found on, but since we’re using a GUID that’s unique across all sites in the collection we don’t need that.
completefunc: function(xData, Status)
This is where the real magic happens. The completefunc parameter represents a callback function that SPServices executes once data has been loaded, and it takes two parameters: xData and Status.
Our completefunc does some basic error handling, and then calls another function to do the dirty work.
if (Status == 'success' && ($(xData.responseXML).find('ErrorCode').text() == '0x00000000' || $(xData.responseXML).find('ErrorCode').text() == ''))…
For the Status parameter that’s passed in to completefunc, we’re looking for it to contain a value of ‘success’. We have to be a little careful about exactly what this means though: To SPServices success means that it’s passed a query to SharePoint and received a response. It doesn’t mean that our query was well formed, or that we received any useful data back. Basically you’ll always get a successful status unless SharePoint is down – in which case our webapp probably wouldn’t be available to users anyway.
To check that our query has truly been executed successfully by SharePoint, we look in the responseXML for an error code. Depending on the version of SharePoint we’re running, that will either be 0x00000000 or blank.
shippingData = $(xData.responseXML).SPFilterNode('z:row');
There are few ways we could approach what happens next. My goal was to keep my code as simple as possible so I’m doing some things that may not be best practice. This is one of them: we take the data SPServices has returned and put it into a global variable.
The data SharePoint has passed back to us is in XML format and contains a wealth of information about our query, metadata about the response, and so on. We don’t really need any of this stuff – we just want the data itself – so SPServices has a function called SPFIlterNode that helps us filter the returned data down to what we actually care about. We’re filtering here by z:row. Each z:row returned represents one entry from our SharePoint list.
populateDropdown();
Now that we have our data in a globally accessible variable, I’m outsourcing the processing of it to another function: populateDropdown. That last step for our completefunc is to call this function.
Populating the Dropdown List
OK! So now we have the data we need loaded from our SharePoint list and resident in memory (in our shippingData global variable) so that we can manipulate it and our users can interact with it. The first step of this process is to populate the relevant options into the select box we created in our HTML. I’m doing that (surprise surprise) with the populateDropdown function.
function populateDropdown() {
   $('select#destination option').remove();

   for (i = 0; i ' + $(shippingData[i]).attr('ows_Title') + '');
   }
}
If you recall, the dropdown list initially contains a single option with the text Please wait, loading data…. At this point in the story our data is loaded, so let’s get rid of that option first:
$('select#destination option').remove();
Done! Good. The next step is to loop through each of the items we’ve loaded into our shippingData variable, and add them as an option in the dropdown. We do this with a standard for loop:
for (i = 0; i
If you’re not familiar, this construct sets a variable i to zero, then loops through the following block of code multiple times, as long as i is less than shippingData.length, which is the number of items in our shippingData variable. On each iteration i is incremented by one (i++).
On each loop we add an item to our dropdown, using jQuery to append the relevant HTML. Based on the data that exists within our SharePoint list, we end up with these options in our dropdown:

Each $(shippingData[n]) has an attribute for each of the columns in our list. These attributes all have the prefix ows_, and, as mentioned in lesson 3, they are all referenced by the original name of that column (even if it’s been renamed since it was created). That’s why we’re using the attribute ows_Title to get at the data that’s in our Province column: the column was called Title when the list was created, and we renamed it.
Performing the Calculation
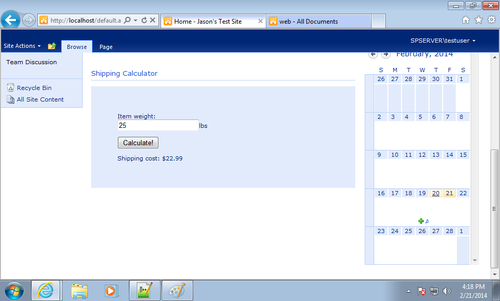
With any luck everything in our story up to this point will have happened in a split second, but regardless we’re now ready for user input. The user selects the destination province, inputs the weight of the item being shipped, and hits the calculate button.
The calculation itself is really no different from the one we built in lesson 1, the difference being that our variables are defined by the list data rather than hardcoded in.
We still identify that the Calculate button has been pressed through the use of the jQuery $(‘input#calculate’).click(function() {});, but our first step is now to set some variables based on whatever is selected in the destination province dropdown at the time.
bp = parseFloat($(shippingData[$('select#destination').val()]).attr('ows_BasePrice'));
bw = parseInt($(shippingData[$('select#destination').val()]).attr('ows_BaseWeight'));
ap = parseFloat($(shippingData[$('select#destination').val()]).attr('ows_AdditionalPrice'));
aw = parseInt($(shippingData[$('select#destination').val()]).attr('ows_AdditionalWeight'));
We set each of these variables by reading the relevant attribute (representing the column in our SharePoint list) from $(shippingData[n]), where n is the value of the destination dropdown, $('select#destination’).val(). After that, it’s business as usual:
var shippingcost = bp;
if ($('input#itemweight').val() > bw) {
shippingcost += (Math.ceil(($('input#itemweight').val() - bw) / aw) * ap);
}
$('span#shippingcost').html(shippingcost);
Putting it All Together
And we’re done! The completed code block – including all the javascript and HTML – that we copy and paste into our content editor webpart is as follows:
/web/js/jquery-1.11.0.min.js
/web/js/jquery.SPServices-2014.01.min.js
var shippingData = false;
$(document).ready(function() {
$().SPServices({
operation: 'GetListItems',
listName: '{4883AC18-E2A5-4EAF-8446-23B15B43861A}',
completefunc: function(xData, Status) {
if (Status == 'success' && ($(xData.responseXML).find('ErrorCode').text() == '0x00000000' || $(xData.responseXML).find('ErrorCode').text() == '')) {
shippingData = $(xData.responseXML).SPFilterNode('z:row');
populateDropdown();
} else alert('Something went wrong!');
}
});
$('input#calculate').click(function() {
bp = parseFloat($(shippingData[$('select#destination').val()]).attr('ows_BasePrice'));
bw = parseInt($(shippingData[$('select#destination').val()]).attr('ows_BaseWeight'));
ap = parseFloat($(shippingData[$('select#destination').val()]).attr('ows_AdditionalPrice'));
aw = parseInt($(shippingData[$('select#destination').val()]).attr('ows_AdditionalWeight'));
var shippingcost = bp;
if ($('input#itemweight').val() > bw) {
shippingcost += (Math.ceil(($('input#itemweight').val() - bw) / aw) * ap);
}
$('span#shippingcost').html(shippingcost);
});
});
function populateDropdown() {
$('select#destination option').remove();
for (i = 0; i ' + $(shippingData[i]).attr('ows_Title') + '');
}
}
Destination province:
Please wait, loading data...
Item weight:
lbs
Shipping cost: $0
Taking it Further
The next steps with our shipping calculator app would be to add some additional error-checking and handling, and maybe amend the code to avoid using unnecessary global variables. I’ve kept things as simple as possible here for the sake of example.
After that? As I mentioned earlier, there’s a lot of cool stuff we can do with SPServices. Where you go from here is really up to you, but hopefully you can see some possibilities. Even with the basic building blocks of reading from and writing to lists, it’s possible to build some really cool stuff on top of SharePoint, possibly even taking the approach of using SharePoint as a database for a webapp that has its own look and feel.
Enjoy!