Blog

Inky Impression Picture Frame #2: Creating My Node.js App

A couple of weeks ago I posted about picking up an Inky Impression picture frame and taking the initial steps to getting it working with a Node.js app.

That app is definitely not done, but it has continued to take shape over the last couple of weeks. I’ve been holding off on posting about it because – as I said in my original post above – one of the features I wanted was to have sync with a specific folder in my Google Photos account. Google have recently made some changes to their Photos API that in theory make what I want to do impossible.

I came up with an approach that shouldn’t work but somehow does. I came across someone else’s project with similar hardware (that I can’t find the link to right now, sorry) who was using a tool called rclone to sync from a Google Photos album. I’m familiar with rclone, and I use it to back up to my cloud storage provider. Google Photos is one of the providers it works with, so I thought I’d give it a try.

The changes to the Google Photos API that were going to affect me should be having the exact same impact on the rclone software but for some reason that just doesn’t seem to be the case. It’s now been four days since Google supposedly implemented their API changes and my setup is still working šŸ¤ž

Even better, someone has created a Node.js wrapper for rclone that I can simply plug directly into my app as a library.

Here’s my code (which is also available in my git repo for the project):

const rclone = require('rclone.js')
const schedule = require('node-schedule')
const fs = require('fs')
const sharp = require('sharp')
const inky = require('@aeroniemi/inky')

const frame = new inky.Impression73()
const folder = './gallery/'

var ticker = false
var filelist = false

function downloadImgs() {
	console.log('Starting download from Google Photos...')
	const sync = rclone.sync('gphotos:album/Family Room Photo Frame', folder)

	sync.stdout.on('data', function(data) {
		console.log(data.toString())
	})

	sync.on('exit', function() {
		console.log('Synchronized from Google Photos. Loading images...')
		loadImgs()
	})
}

function loadImgs() {
	fs.readdir(folder, (err, files) => {
		if (err || files.length == 0) {
			console.log('No images found. Exiting.')
			process.exit(1)
		} else {
			console.log(files.length + ' images found. Starting album display...')
			filelist = files
			displayAlbum()
		}
	})
}

function displayAlbum() {
	if (filelist.length == 0) loadImgs()
	else {
		imgref = Math.floor(Math.random() * filelist.length)
		imgfile = filelist.splice(imgref, 1)[0]
		console.log('Randomly displaying image ' + (imgref + 1) + ' of ' + (filelist.length + 1) + ' remaining: ' + imgfile)
		displayImage(imgfile)
		ticker = setTimeout(displayAlbum, 1800000)
	}
}

function displayImage(filename) {
	sharp(folder + filename)
	  .resize(800,480)
	  .toFile('output.png', (err, info) => {
		frame.display_png('output.png')
		frame.show()
	})
}

// We start by downloading images. Other functions will be called if this is successful...
downloadImgs()

// Define a cron-job to restart everything at 1:30am (including a refresh of the album)....
schedule.scheduleJob('0 30 1 * * *', function() {
	clearTimeout(ticker)
	console.log('Resetting...')
	downloadImgs()
})

It’s of course still a work in progress. There’s a lot of stuff here that should be a configurable option that I’ve just hardcoded in, and there’s not yet any way to interact with the app, but essentially what it does is pretty straight-forward:

  1. On startup, the code downloads the content of a Google Photos album named ‘Family Room Photo Frame’
  2. It displays a random photo and crosses that one off the list, waits 30 minutes, picks another random photo from what’s left, displays it, and repeats the cycle until all photos have been shown.
  3. When there are no photos left it reloads the list and starts the cycle over
  4. Every morning at 1:30am it stops what it’s doing and starts everything over, including doing a refresh of what’s in the Google Photos album

To set it up you mostly just need to clone the git repo and run it, but there are a couple of important extra steps. You need to run npx rclone config and set up an rclone remote named gphotos to connect to your Google Photos account. Inside that account you either need to have an album named Family Room Photo Frame or you need to edit line 15 of the code to match an album that you do have. It can be a shared album, so others in the household can contribute to it too.

I then used pm2, which is my favourite tool for managing the running of node apps, to start the app. PM2 takes care of both running the app as a service of sorts on system startup, and will also automatically restart the app in the event that it crashes.

More to come, but I’m already loving this thing.

Blog

New Nerdy Project: Inky Impression Picture Frame

The other day (coincidentally, on Pi Day) I posted on Mastodon about picking up some new Raspberry Pi and accessories for a couple of new projects.

Well, this is the first one! I’ve constructed an e-ink picture frame.

Over on YouTube, AKZ Dev has recently posted a few videos about the hardware I’m using: a 7.3″ e-ink display from Pimoroni called the Inky Impression.

He’s also been writing some python software to power it, and while I’m sure what he’s created is great the point of this project for me is as a learning exercise, so I’ll be writing my own code.

Hardware

First of all though, I had to assemble the hardware. This is pretty straight-forward:

I may still get a wooden picture frame to put this in for better aesthetics, but for now my 3D printed version is working great. You put the Pi into its 3D printed case, the display into its 3D printed case, and then you plug them together and give it some power. Done!

I wish that the colours on the display were a little more vibrant than they are (this aspect of the display is not quite as good as I was expecting it to be) and I wish it updated a little more quickly (this is exactly as I expected it to be, and it takes about 30 seconds), but on the whole I like this e-ink display much more than I like backlit LCD photo frames.

Software

I downloaded my new favourite OS for the Raspberry Pi, DietPi, as a base and let it guide me through the setup process to connect to WiFi, set the timezone, the usual stuff. A couple of particular options to pay attention to during setup were to enable I2C and SPI, which is how the Pi communicates with the screen through the GPIO header, and install a NodeJS environment which I did simply by selecting it from the DietPi software installer.

Pimoroni suggests Python as the language to use and offers a Python library for that purpose, but I have limited experience in Python and I’m much more comfortable with Node, so that’s what I’m going to use if I can.

As a proof of concept, I wrote a half-dozen lines of code that take an input image, resize and crop it to fit the display, and render it on the screen. I’m using the sharp library for the image manipulation, and the inky library from aeroniemi to interact with the display.

const sharp = require('sharp')
const inky = require('@aeroniemi/inky')
const frame = new inky.Impression73()
sharp('../img/OriginalImage.jpg')
  .resize(800, 480)
  .toFile('output.png', (err, info) => {
	frame.display_png('output.png')
	frame.show()
})

So far this is working great. I obviously plan to extend this, and I’ll make the eventual code available if anyone else wants to replicate what I’ve done. Features I’m currently thinking about are:

  • Connect to a specific album in my Google Photos account
  • Rotate through the images in the album, updating every five minutes or so
  • Ability to skip forward and back using the buttons on the side of the display, maybe
  • Ability to skip forward and back by issuing a command over MQTT (of course I’m integrating this thing with Home Assistant)
  • Ability to display some specific content (other than the usual album) based on an MQTT command or button press… what I’m thinking of here is my WiFi username and password that I can interrupt the slideshow to display for guests along with a QR code with the connection details
  • Maybe the ability to display a webpage by loading it headlessly and taking a screenshot (I believe AKZ Dev’s software can do this and it seems like it opens up lots of possibilities)
  • Maybe a REST API in case I want to use that rather than MQTT

This’ll all take me some time and I’m not in a rush, but I’ll post more as I work on it!

Shrapnel

Earlier in the week I wrote a blog post about how I set up my Office display using a Raspberry Pi 3B+

Today I picked up a Pi 4 and a Pi Zero 2 W for other projects (watch this space!) and I was curious how they’d perform. So I raced them. From the time I press the “power on” button on my TV remote to the time they’re displaying a webpage.

DeviceTime
Raspberry Pi 3B+1:05
Raspberry Pi Zero 2 W1:25 (+20 secs)
Raspberry Pi 4B (4gb)0:49 (-16 secs)

This is not super-scientific. I think the 3B+ is usually faster except it took longer than usual to obtain an IP address during its boot process. šŸ¤·šŸ»ā€ā™‚ļø

What was most interesting to me was the differences between the 3B+ and the Zero 2W: the initial parts of the Zero’s boot process were quicker than the 3B+, but as soon as it got into dealing with graphics and opening the browser it slowed down dramatically. Even changing from one screen to another in my dashboard and reloading page elements were slow enough that I would need to change my dashboard layout. It really wasn’t performant enough for what I’m doing.

The Pi 4, unsurprisingly, performed great – although the difference between the 3B+ and the 4 wasn’t as big as I thought it would be. The Pi 4 is also too power hungry to be powered by my TV’s USB port, which is a really nice feature of my setup.

Whether by luck or judgement, the setup I have is the one I’d recommend if you want to do something similar. I’m almost tempted to buy more Pi 3s in case I want to replicate it somewhere else in the house.

Blog

How to build a dashboard display with a Raspberry Pi

Skip intro >>

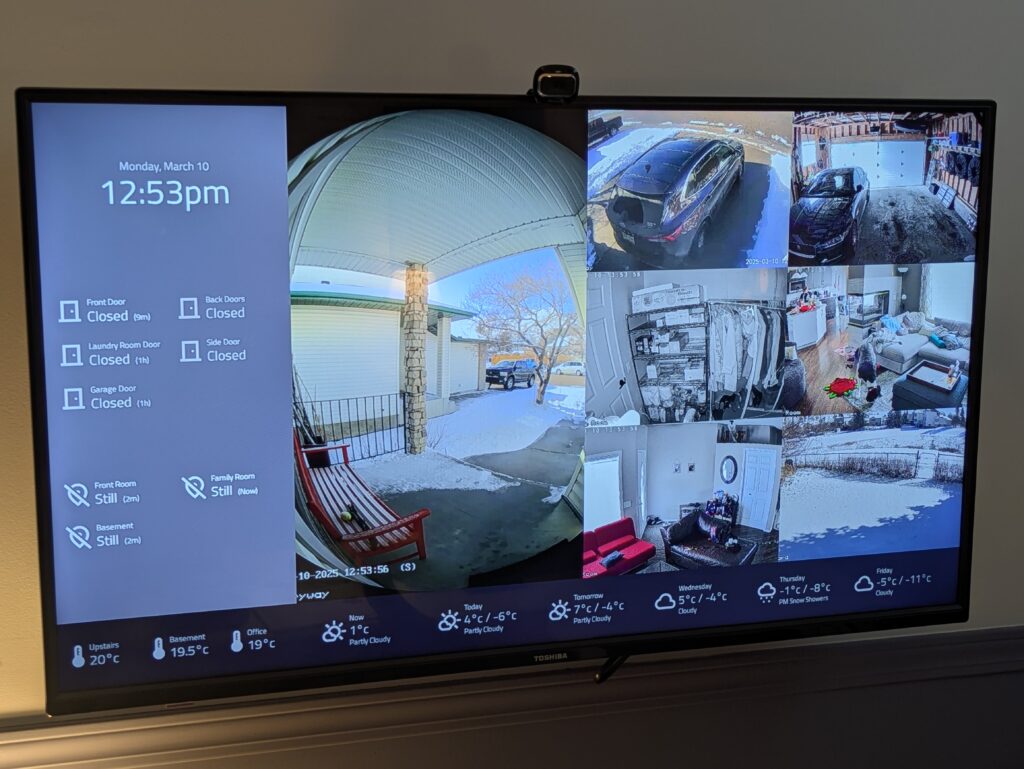
In my office I have a TV on the wall that shows me some pertinent info about what’s going on with our house (thanks to Home Assistant and our array of Smart Home sensors) and the weather, and rotates the display between my calendar, a Google Map with the local traffic overlay, and a view of our security cameras.

I’ve had it for many years and I set it up by (mostly) following a 2016 guide.

The whole thing runs on a Raspberry Pi 3b which I love because I can power it using the USB port built into my TV. The low-power hardware makes optimization critical, hence why the Pi is set up with just enough software to run a lightweight web browser and nothing more.

I’ve recently been on a bit of a journey of switching to Linux for almost all my computing – more to come on that in a future post – which has led me to go through all my devices one by one and get them set up the way I wanted. That inspired me to take a crack at the office Pi too.

It was working just fine before I touched it so I wasn’t necessarily expecting to make any changes, but I thought it might be good to see if the software options identified nine years ago are still the most optimal.

No they’re not as it turns out, so here’s my updated guide on setting up a Raspberry Pi to display a web page (and nothing more, nothing less).

The Operating System

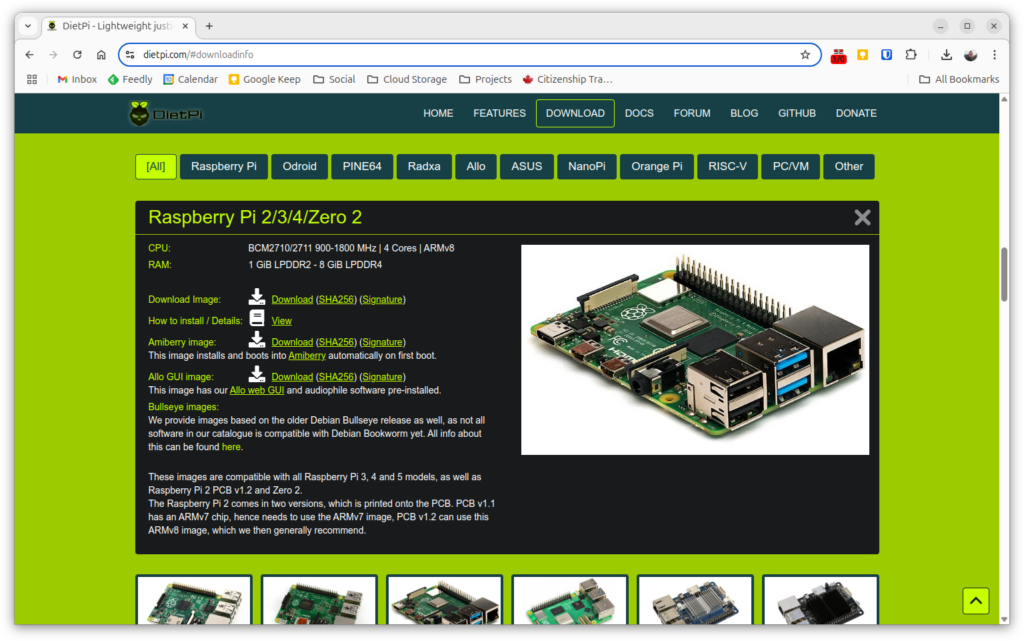
My first change was the base operating system. I switched to DietPi. Download the image for your particular device and install it. There are instructions on the DietPi site if you need them.

Work through the DietPi setup process that automatically launches when you first boot the drive and log in, in particular:

  • Set the localization options (keyboard layout, system locale, timezone)
  • Connect to the internet – in my case I used the Pi’s built-in WiFi – and optional but recommended: disable any connections you won’t be using (e.g. wired Ethernet) so they don’t slow the boot process
  • Enable SSH if you want it
  • Set autologin as root – generally it would be good practice not to use the superuser account for day to day operation and instead set up another account with only the privileges needed, but this setup is so basic we’re not going to worry about it
  • Don’t install any of the software packages – we’re going to carefully install only what we need

For some reason my networking settings didn’t take effect on first setup and I had to reboot and repeat that part of the setup by launching dietpi-config from the command line.

The Software

Our goal with the software we install is two-fold:

  1. If we don’t absolutely need a piece of software, we’re not installing it
  2. We want the software we are going to install to be as lightweight as possible

All we want to do is display a web page on a display. We don’t even really need users to interact with our system. To get this done we’re going to need an X server, a window manager, a web browser and couple of utilities to tie everything together. Let’s get it installed:

apt update
apt upgrade
apt install xserver-xorg x11-xserver-utils dwm surf xinit unclutter

We’re using the X.Org X server, the dwm window manager and surf browser (both from suckless.org), and we’re installing unclutter to hide the mouse pointer when it isn’t in use.

Configuration

First we’re going to create a startup script: nano /root/startdisplay.sh

#!/bin/bash
# Disable DPMS (Energy Star) features.
xset -dpms
# Disable screen saver
xset s off
# Don't blank the video device
xset s noblank
# Allow quitting the X server with CTRL-ATL-Backspace
setxkbmap -option terminate:ctrl_alt_bksp
# Disable the mouse pointer
unclutter &
# Run window manager
dwm &
# Run browser in full-screen mode
surf -F https://www.google.com

Replace https://www.google.com above with the URL of your dashboard, then press Ctrl-O to save the file followed by Ctrl-X to exit nano. Next, make the script executable:

chmod +x /root/startdisplay.sh

Finally, edit /root/.bashrc and add the following three lines at the end:

if [ -z "${SSH_TTY}" ]; then
  xinit ~/startdisplay.sh
fi

This will start X and run our startdisplay script when the root user logs in directly to the device, but not if they’re logging in over SSH (where it wouldn’t work anyway).

And that’s it, done! Reboot your Pi and enjoy your display.

My Pi3B takes around 45 seconds from power on to the point where it’s displaying my dashboard web page, which is less than half the time the previous software setup took (the hardware has remained the same throughout).

The Exciting Conclusion

I’d love your feedback on all this. Is there an even more efficient setup I’m missing? I’d also love to hear about your use case.

Blog

Smart Home Dashboard

[youtube https://www.youtube.com/watch?v=8N087dKoKno?feature=oembed&enablejsapi=1&origin=https://safe.txmblr.com&wmode=opaque&w=540&h=304]

Recently, I have been all about turning our home into a smart home. That’s mostly because I’ve discovered Home Assistant: a little piece of software that runs (in my case) on a Raspberry Pi and pulls together data from all the sensors and smart devices you own.

Apart from a new WiFi thermostat that I was going to buy anyway I haven’t yet spent any money at all in my quest for this – I’ve merely connected together the devices we already owned (Chromecasts; family room lights; our burglar alarm), added in some data available through various APIs (weather; internet speed; server status) and pulled location information from our phones using an app that publishes the information to my own server.

Anyway, now that I have all this information in one place I wanted an attractive way to display it in my office. Happily I’d already bought a monitor with a built-in powered USB hub from a surplus equipment sale a while back, with this kind of project in mind.

So, my Friday afternoon project today became hooking up another Raspberry Pi to this monitor and crafting a HTML dashboard for it to display. Not everything works yet, but I think it’s pretty good for an afternoon’s work.

(Since I didn’t remove the clock from the frame when I shot the video, I can’t pretend this thing is quick to boot. I may have manipulated the video speed at a couple of points. But anyway).

Oh, and watch this space for some home-brew smart home devices, coming soon!

Blog

Raspberry Pi Whole Home Audio: The Death of a Dream?

If you’ve been following my blog for a while, you’ll know
that I’ve written a whole
series of posts
on my efforts to take a few Raspberry Pis and turn them
into a DIY whole home audio solution.

If you’ve ever looked at the product offering within the
whole home audio space, you’ll know that setting such a thing up is either
cripplingly expensive, involves tearing the walls apart to run cables, or both.

Where we left off I’d put together a solution that was
glorious when it worked, but that was rare. Typically the audio was either out
of sync between the devices right from the get go, or quickly got that way.

Getting the Pis to play the same music was relatively
simple, but getting it perfectly in sync so that it could be used in a
multi-room setup eluded me to the end, and eventually I gave up.

The bottom line is that synchronizing audio between multiple
devices in a smart way requires specialized hardware that can properly account
for the differences in network latency between each of the end points. The Pi
doesn’t have that, and it’s not really powerful enough to emulate it through
software.

So is my dream of a reasonably priced whole home audio
solution dead? Hell no.

In October I wrote
about Google’s announcement of the Chromecast Audio
. At the time it didn’t
have support for whole home audio but Google had promised that it was coming.
It’s here.

The day they announced that it had arrived was the day I
headed over to my local BestBuy and picked up four of these things. I plan to
add two more, and I couldn’t be happier with the results.

Plus, it frees up the Pis for other cool projects. Watch
this space!

Blog

Raspberry Pi Whole Home Audio – The Conclusion?

Welcome to what is possibly the concluding post in my Raspberry Whole Home
Audio Project
series of posts… or possibly not.

At the start of this journey I had a plan to install mopidy on one of my Raspberry Pis and use pulse
audio
to stream the output to the others. Along the way I ran into some challenges
stemming from me buying the cheapest peripherals I could (and subsequently needing
to upgrade the WiFi adapters and power cables I first bought to better ones),
and my vision evolved as things progressed.

Instead of using mopidy, I switched to installing Kodi on each of the Pis thanks to the OpenElec linux distribution that’s available for
several types of hardware, the Pi included.

image

Kodi, as a full-blown media centre system, might seem like a
bit of an odd choice for a headless device (i.e. something with no attached
display), but it’s the right choice for me for a couple of reasons.

  • I already have it installed on a couple of PCs
    in the house, attached to the TVs in the living room and the bedroom
  • I already have a remote
    control app
    for it on my phone
  • There are plugins for a bunch of stuff, such as this one for my favourite music streaming service. Well written
    plugins integrate perfectly with the system, and the remote control app.
  • It has built-in support for acting as an airplay
    receiver

For me, these things combine to provide me with the best of
both worlds. If I just want to play music from my library or from an internet
streaming service on one set of speakers, then I fire up the remote app and
target the particular device I want to output from.

If I want to play the same thing on several (or all) the
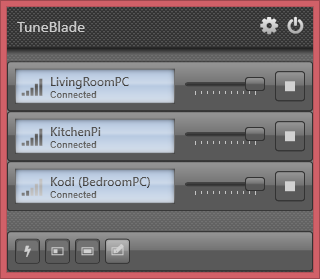
devices at the same time, then I fire up TuneBlade
on my laptop and any sounds that would usually come out of its speakers get
redirected to all the airplay receivers.

image

When it works, it’s glorious. Having the same music playing
in sync on all the speakers in the apartment is awesome.

The problem is that it doesn’t always work. TuneBlade
includes a setting that lets you set how much of a buffer you want. If you set
it too high the devices won’t synchronize because it will take a slightly
different amount of time to fill the buffer on each of them. I have it set to
zero, which works amazingly well most of the time but leaves me especially
prone to blips in network connectivity and bandwidth. When these occur, things
get out of sync (which sounds terrible, because each set of speakers is not all
that far away from its neighbours), and it can’t seem to automatically recover –
I have to manually disconnect and reconnect the affected player to get it back
in sync with its peers.

The bottom line then is that my setup is good, but not
perfect. It’s no Sonos.

The search for a perfect system will likely continue, but
for the time being I’m pretty content. I spent less than $100, and I have a
setup that would have cost me $5,000 from them.

Blog

Raspberry Pi Whole Home Audio Updates

It’s been a long time since I’ve written about my Raspberry Pi Whole Home Audio Project.

Simply, that’s because I’ve hit a bit of a wall and I’m especially busy with work right now so I haven’t been able to find the time to work my way around it.

The problem is that the USB WiFi adapters that I bought (for about $5 each) don’t perform well. They have signal strength issues, and while they do work and maintain a network connection, the poor signal strength means the connection isn’t fast enough to stream audio. There are plenty of other people out there having the same problem. You get what you pay for, I guess, and I need to buy replacement adapters.

I’m also considering a change in direction. My original plan was to install mopidy on one of the Pis and use pulse audio to stream the output to the others.

I’m considering instead installing TuneBlade on one of my Windows PCs. TuneBlade takes all the audio output from that computer and streams it using Apple’s AirPlay protocol. I’d then install ShairPort on all the Pis to turn them into AirPort receivers.

What do you guys think?

Blog

Raspberry Pi Whole Home Audio: Playing Music

It’s very rare that I tweet teasers to my blog post, but
last weekend I was so excited to be making progress on my Raspberry Pi Whole
Home Audio
project that I told the world I’d be publishing this one on
Thursday.

Here we are on Friday morning. There’s doubtless a lesson in
here for me about making promises I can’t keep, but I’m hoping you’ll forgive
me when you read about what I’ve done.

If you’ve been following my #RPiWHA Project
hashtag on this blog then you’ll know that when we left off last time I had
three Raspberry Pis networked together with synchronized clocks, and one of
them had access to the internet and the music library I keep on my home server.
That’s important, but not especially exciting. Today we’re going to move in a
more exciting direction, though.

Today we’re going to put Pis #2 and #3 aside, but we’re
going to get Pi playing music!

Specifying and Testing the Pi’s Audio Output

The Raspberry Pi has two options for audio output. It has a
3.5mm analog output, and digital output through its HDMI port. It decides which
output to use automatically – if you have a HDMI monitor plugged in then the Pi
will detect this and assume you want to use HDMI for audio too.

That’s not the situation for me (my Pi is ā€œheadlessā€ and
doesn’t have a display connected at all), and audio comes out of the 3.5mm
output automatically – which is what I want. If you need to specify, you can
run:

sudo amixer cset numid=3 1

The digit 1 at the
end means the Pi should use the analog audio output. Putting 0 there instead would mean auto-detect
(the default) and putting 2 would
mean digital output over HDMI.

Plug in some headphones or speakers and run:

aplay /usr/share/sounds/alsa/Front_Center.wav

You should hear a voice saying ā€œfront centre.ā€

Install Mopidy

We’re going to install music playing software called mopidy.
It provides a web-based interface so you can control your music, or there are
controller apps available in your app-marketplace of choice. Mopidy’s website
takes you through the
install process in detail
, but I’m going to summarize the commands here:

wget -q -O - https://apt.mopidy.com/mopidy.gpg | sudo apt-key add -
sudo wget -q -O /etc/apt/sources.list.d/mopidy.list https://apt.mopidy.com/mopidy.list
sudo apt-get update
sudo apt-get install mopidy python-setuptools

Done! We now have a basic install of mopidy, and the especially
astute amongst you will have noticed that we’ve also installed a package called
python-setuptools. Mopidy is written
in the python programming language, and the latter package is going to help us
with installing and setting up some mopidy extensions in an automated way. The
first thing we’re going to do is install something called pip, which is a tool for installing python packages:

sudo easy_install pip

Now that we have that, we’re going to in turn use pip to
install some mopidy extensions:

sudo pip install Mopidy-MusicBox-Webclient
sudo pip install Mopidy-WebSettings

With those commands we’ve added a web-based interface to our
player so we can control it from a browser on another computer or mobile
device.

Setting Up Mopidy

We’re almost ready to start mopidy and try things out, but
there is a little bit of initial setup to be done first. Edit the file ~/.config/mopidy/mopidy.conf. In the http section, change the following line
so that the web interface becomes accessible to any device on your network:

hostname = ::

In the local
section, tell mopidy where it should find your music library. In my case:

media_dir = /mnt/music

Save the file and exit. The next step is to tell mopidy to
scan your music folder:

mopidy local scan

If, like me, you have a large music collection stored on a
network share, be prepared for this to take a very long time. I started it
running before I went to bed, and it eventually completed the process about 45
minutes after I got up the following morning.

When it’s done though, we’re ready! Run mopidy:

mopidy

It’ll take a little while to fully start up, but when you
see the line

INFO     HTTP server running at [::]:6680

that means we’re good to go. Open the browser on your
computer or mobile device and point it to
http://192.168.1.71:6680/musicbox_webclient (replace 192.168.1.71 with the IP
address of your Pi as appropriate). Go to Browse, Local Media, and select a
song!

If all is well the music will be playing through the
headphones or speakers attached to the Pi, and we’re all done until the next
installment – rerouting the audio from Pi and streaming it, synchronized, to
Pis #2 and #3 instead.

Enjoy!

Blog

Browse Anonymously with a DIY Raspberry Pi VPN/TOR Router

So, after last week’s post about preparing my Raspberry Pis for my whole home audio project, I had three Pis that should have been set up properly, but weren’t working very well – and the culprit was the USB WiFi dongles I was using.

Happily a stumbled upon the article linked above, and it solved the issues I was having!

Surf the Internet securely with your very own portable WiFi VPN/TOR router. You can configure a Raspberry Pi with Linux and some extra software to connect to a VPN server of your choice.

I didn’t follow all the steps because they’re doing something different to me, but there is some commonality and, crucially, the article folks are using WiFi adapters with the same chipset that mine have. Step four shows you how to download and compile a version of hostapd that’s built especially for them and works well. I’ve updated my previous post with these steps.

Now that I have networking all set up I’ve taken a couple of extra steps:

  • I set up passwordless ssh between the three Pis. This isn’t required for my solution per se, it just makes things easier.
  • I used sshfs on pi to connect it to my existing home server, and mount the folder that holds all my music.

I’m excited to move on to next steps! The prep work was necessary, but it didn’t make for an especially interesting blog post because it’s all a bit dry.

Keep following my #RPiWHA Hashtag! The next installment will be more interesting, I promise. We’re going to get some actual music playing!

Browse Anonymously with a DIY Raspberry Pi VPN/TOR Router