Blog

SharePoint Development: Lesson 1

Welcome to lesson 1 of my mini-series on SharePoint development! This is the first post where we really dive in and get our hands dirty, although I did previously write about installing SharePoint in a Virtual Machine. Anyway, I’ve been threatening to write about this stuff for quite some time now, so it’s probably about time I got started.

I’m going to assume as I write this that you already have at least a little familiarity with SharePoint and it’s capabilities, as well as some experience with HTML, javascript and jQuery. With these assumptions in place what I’m going to help you do is tie everything together to create some cool SharePoint-based tools, but don’t worry – we’re going to start off slowly.

SharePoint Document Libraries

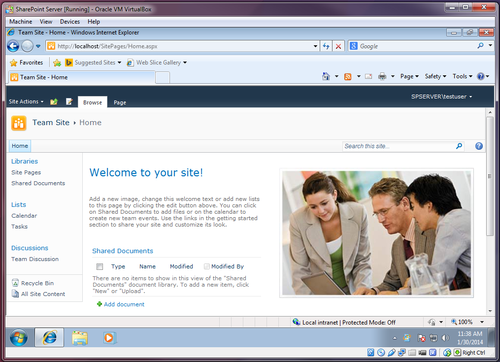
Document libraries are a feature of SharePoint that you probably already know about. They’re a great way to store Microsoft Office documents that should be shared with a wider audience throughout a team or an organization. You can enable version control, and there are features to prevent clashes in situations where multiple users may try to work on the same document at once.

For our purposes we don’t care about most of that, but SharePoint document libraries can contain any type of file – not just office documents. For today, we’re going to use a document library simply as storage for an HTML document and the jQuery library, and we’re going to build a simple tool to calculate shipping costs. Over time we’re going to integrate this same tool more tightly into our SharePoint site, and begin to leverage more and more of SharePoint’s functionality.

But like I said, we’re starting slowly.

Creating a Document Library

Creating a new document library is a fairly simple affair. Some versions of SharePoint (2010 onward) have a shortcut for it in the Site Actions menu, but regardless of the version you’re running if you to Site Actions > View All Site Content and then hit the Create button you’ll find what you need. Select Document Library from the list of things that you can create.

Next, give the document library a name. It really doesn’t matter what you call it because we’re not going to send people to the document library itself – just to content within it. The name will feature in the URL of files that we store though, so for simplicity I’d recommend a name without any spaces. I always call mine “web,” but that’s just personal preference.

Under Display this document library on the Quick Launch? we’re going to select No. Choosing yes places a link to the library on the main page of the site, but as I noted – we don’t really want people to visit the library directly.

For Create a version each time you edit a file in this document library? you can select No here also – as we move through successive lessons in this series we’ll end up using the library only to store assets like scripts and images, so we don’t really need this feature. You can leave the Document Template drop-down at it’s default value – this setting won’t be relevant to us either.

Finally, hit the Create button at the bottom of the window.

image

The document library is now created. The first thing we’re going to do is create a folder for javascript files. Hit the New Folder button and create a folder called js. For today, this is the only folder we’re going to need. Download the jQuery library from the web, and upload the javascript file to the js folder.

Creating the HTML Page

I’m not going to dwell too much on this section because you can find much better tutorials out there for this than I could write, but I’m going to create a simple tool that asks for an item’s weight and then spits out a shipping cost.

For the sake of the example, I’m going to calculate shipping costs as follows: costs are $19.99 for anything up to 20lbs, and then an extra $3 per 5lbs (or part thereof) for anything heavier.

I’ve kept the code extremely simple with no error checking or any such niceties (in a real world tool you’d want to be more robust), and here it is:

<!DOCTYPE html>
<html>
<head>
   <title>Shipping Cost Calculator</title>
   /web/js/jquery-1.11.0.min.js
   
      $(document).ready(function() {
         $('input#calculate').click(function() {
            var shippingcost = 19.99;
         
            if ($('input#itemweight').val() > 20) {
               shippingcost += (Math.ceil(($('input#itemweight').val() - 20) / 5) * 3);
            }
        
            $('span#shippingcost').html(shippingcost);
         });
      });
   
</head>
<body>
   <h1>Shipping Calculator</h1>
   

Item weight:
lbs

Shipping cost: $0

</body> </html>

The only really notable part here is that we’re linking to the javascript file we uploaded earlier:

/web/js/jquery-1.11.0.min.js

Save the file as shipping.aspx, upload it to the root of the web document library, and that’s pretty much it!

Why the “aspx” File Extension?

On SharePoint 2007 and earlier linking to an html file in a document library will open the file (which is what we want to happen), but on 2010 onward the file will be downloaded instead. Using the aspx file extension solves this problem.

Linking to the Tool

OK, so we’ve created a useful tool and we’ve made it available on SharePoint, but it’s in a document library that’s hidden from view – a typical user would never find it.

So how do we make this available to a wider audience? Well there are several ways, but I’m going to add a new webpart to the main page of my SharePoint site and put a big, bold link in it.

Back on the main page of our SharePoint site choose Edit Page from the Site Actions menu and click the Add a Web Part button. We’re going to add a Content Editor webpart. You’ll get a word-style editor where you can insert text, images, tables, etc… and crucially links. I’m going to insert a link to the HTML file we’ve just uploaded, and increase the font size to make it stand out on the page. If you’ve been following along exactly then the address of the uploaded file will be /web/shipping.aspx.

You’ll probably also want to go to the Appearance section of the webpart properties and give it a custom title.

image

Conclusion

So, we’ve built a simple webpage with some javascript in there to calculate things for us and we’ve deployed it SharePoint, making it available to site visitors. This is great and all, but it doesn’t really feel like the page is a part of SharePoint. It doesn’t look or feel the same, and from a user experience point of view it seems as though we’re leaving the SharePoint site when we use our calculator tool.

That’s OK though! Today was just about getting started. In part two we’ll take the functionality we’ve just built and integrate it much more tightly into SharePoint itself. Stay tuned!

Blog

Installing SharePoint Foundation in a VirtualBox Virtual Machine

For a while now I’ve been vaguely threatening to write a post or two about my work with SharePoint, but so far I haven’t actually managed to get around to it.

The reason is essentially simple: SharePoint is a huge tool my company makes available to me, and everybody else that works there. They installed and maintain it on their servers, and I am but a lowly user.

That’s fine. The whole point of the development work I do on top of SharePoint is that anybody could do it. I don’t need any special admin rights and I don’t need to get the technical guys involved. The problem is that when it comes to blogging about my work on SharePoint, all my work is on my company’s internal intranet. If I wanted a SharePoint site for testing purposes I’d have to put a request in and I’m not sure it would be approved, I don’t want to build test things on an existing site, and I certainly don’t want to risk accidentally revealing some proprietary information in a screenshot or something.

So, I’m going to install my own copy of SharePoint in a virtual machine and take you through it in this blog post.

Wait, what? Why?

SharePoint server is a big, enterprise-grade tool that powers intranet and internet sites across the world. Why would I want to install it at home? Well aside from using it to blog about my work, I plan on using it to help me work.

When I develop new SharePoint tools for my job I keep then hidden at the start. It’s kind of a security-through-obscurity type deal, and even though I’m typically developing on a live site your average SharePoint user won’t find what you’re working on if there isn’t a link to it on their screen. This is great when you’re launching new things, but if you want to update a tool that’s already been rolled out and is in use it presents some challenges. What do you do in this situation? The choices are either to create an entirely new version of the tool and possibly a duplicate of the data that powers it, or just bite the bullet and make changes to the live production code. I’d rather have my own sandbox environment I can play in without fear of breaking something.

Isn’t SharePoint server expensive?

Yes. But also no! There’s a version called SharePoint Foundation that Microsoft makes available for free, and it’s perfect for our needs. It’s designed to run on Windows Server 2008 or 2012, but it can also be installed on 64-bit versions of Vista or Windows 7, which is what I’m going to do.

Why a virtual machine?

To setup SharePoint server you do need to install some pre-requisites and change some operating system options, and I don’t want to do that on my desktop computer.

OK, I’m in. Let’s go!

Great!

Start by downloading and installing some virtualization software. My environment of choice is VirtualBox so that’s what I’m going to be using. If you don’t have an existing preference for something else, then I’d recommend you do the same.

Creating the VirtualBox VM

  1. Open VirtualBox and hit the new button in the top left
  2. Give your virtual machine a name, select the correct OS type (Microsoft Windows) and version (Windows 7 64 Bit), and hit next.
    image
  3. Set the VM’s memory size. Microsoft says SharePoint foundation requires 4gb of RAM. In a bold decision that may come back to bite me later on, I’m going to give it 1gb.
    image
  4. Complete the remainder of the VM provisioning with the default options. You’ll end up with a 25gb virtual hard drive, but it’s dynamically sized so it won’t take up 25gb of your real-life hard drive.
  5. Your now back to the main VirtualBox window, and your virtual machine has been created – but is empty.  It’s time to install Windows 7. Right-click your new virtual machine at the left of the VirtualBox window, go to the storage tab, select the DVD drive and click the little disc icon on the far-right of the window to point the virtual drive to the Windows 7 install media. This could be a physical disc in your drive, or an ISO disc image.
    image
  6. Back at the main VirtualBox window, hit the start button up top. The virtual machine will open, and the windows install will begin. I’m not going to take you through all the install steps, but it’s no different to installing Windows 7 on a real computer. When you create a user you can call it whatever you want, but you must set a password.
    image

Installing prerequisites and configuring windows

image

Now that we have Windows 7 installed and running in our virtual machine, it’s time to install a few prerequisites before we dive into installing SharePoint itself.

If you’ve already downloaded SharePoint Foundation then you may have noticed it includes an option entitled Install Prerequisites. Bad news – this only works on Windows Server and not Windows 7 or Vista, so you have some work to do.

You’ll need to download and install:

Next, we need to set a few options in the operating system. Open up control panel and go to Turn Windows features on or off.

Here are the options we’re going to set:
image
image

Time to install SharePoint

Finally, we’re ready!

  1. If you haven’t done so already, download SharePoint Foundation 2010 from Microsoft’s website. Make sure you save the file rather than running it, because…
  2. …running it doesn’t work. As I noted, SharePoint is designed to be a server application available to large groups of people, and it requires Windows Server as a result. Except it doesn’t. Read on.
    image
  3. What we need to do is manually unpack the installation file, and change a setting before we can install.
    1. Move the downloaded file into a folder somewhere (on your desktop is fine), open a command prompt, and navigate to that folder.
    2. Type the following command, and extract the files from the archive into the same folder
      SharePoint_SP2_en-us /extract

      image

    3. The installation files are now extracted into the folder. Navigate to the FilesSetup folder. There’s a file in there called config.xml. Open this with a text editor (notepad is fine)
    4. Inside the <Configuration> tag, paste the following line:
      <Setting id=”AllowWindowsClientInstall” Value=”True” />

      Save and close the file, and navigate back to the root of the folder you created.

  4. Run setup.exe by double-clicking, and we’re pretty much good to go! When asked to choose the installation you want, make sure you select Standalone
    image

It may take a while, but if you’ve followed all the steps correctly, SharePoint Foundation 2010 will now install correctly. The final step of the installation is a configuration wizard. Don’t skip this step! Despite its name there are no options you need to select, but you do need to make sure that you run it. It will set everything up for you, and we’re done! When the configuration wizard is complete it will open the site automatically. You may need to log in with your windows username and password.

image   

Blog

Le Projet de 20% est Mort, Vive le Projet de 20%

Traditional proclemations aside, you may have read an article or two earlier in the year saying that Google has killed it’s “20% time” policy.

If you’re unfamiliar and you don’t feel much like clicking the above link, 20% time is…

“…a well-known part of our philosophy here [at Google], enabling engineers to spend one day a week working on projects that aren’t necessarily in our job descriptions.”

It’s well publicised that 20% time has been a significant contributing factor in giving us some of the Google products that we know and love today, so I hope for that reason that these rumors aren’t true. Regardless of that though, 20% time does seem at odds with the way the modern world works.

I’ve blogged a couple of times about ROWE so I’ll do my best not to digress into a further soliloquy about its merits here, but suffice to say I don’t measure my work in terms of time anymore. Allotting 20% of my time to projects that aren’t necessarily in my job description would be nearly impossible for me – not necesarilly because my organization wouldn’t allow it, but because I don’t know that I could figure out what 20% of my time is.

I’ve never worked somewhere with a policy of 20% time similar to Google, but that’s irrelevant. ROWE offers me something much better. I’m essentially free to use my time however I wish as long as the work gets done, and for me “20% projects” are absolutely a part of that.

Just because these 20% projects (as I’ll keep referring to them) aren’t right out of my job description doesn’t mean they aren’t work related, but they do offer me the freedom to try new things without fear of failure, and that leads to some great innovation (it leads to some failures and dead ends too, but that’s the point – it doesn’t matter).

I plan to blog some more about the gritty technical details in the not too distant future, but I’ve recently built a dashboard web-app on top of SharePoint using jQuery and SPServices. People love it, and it’s greatly increased my stock at work over the last few days. If my boss had come to me and asked me in a formal setting to develop this I don’t know if I’d have touched it. If it were a formal project from the start we’d have had to get IT to build it for us, probably at great expense. I, by contrast, learned how to do this stuff as I went along, and when I started work on it I had no idea if I’d be able to bring things to a successful conclusion.

My hope for my organization as ROWE becomes more of a popularised concept and way of working is that it encourages and enables other people to try new things – filter out the noise, spend less time doing and more time thinking. It worked for me, and it can work for you too.

Blog

Technology, for Process’ Sake

On Monday, a new piece of technology will launch at work. It’s a tool I both designed and built, and I’m extremely proud of my work.

The tool itself is web-based. It lives on a SharePoint server, is written in HTML with a healthy dollop of jQuery and the SPServices library thrown in for good measure.

It took some effort to build it, and I think the approach is a good one because on the back-end it makes good use of SharePoint’s functionality, but the front-end is completely custom with in-line error checking and user interface customizations that go far beyond what could be accomplished with SharePoint alone.

But that has nothing to do with why I’m proud of my work.

I’m also not especially proud of the project management stuff I did to bring this all together. It’s not that it was bad work, but my tool ran the risk of butting heads with a six sigma project that somebody else was running. They were basing a certification on their work, so I agreed not to implement anything until they were done. I thought I’d sequenced my work correctly, but when their three week pilot turned into a seven month pilot, I had nothing to do but wait.

To understand why I’m proud, we need to step back a bit.

The tool I’ve developed replaces another tool that was previously in use. It was also web-based, and it was owned by our organization’s IT team. As best as I can tell it was introduced in 2002, and in the eleven years since it launched we’d noticed a few niggly errors. We had a list of changes we wanted but this was minor stuff, the tool was used only by a select group of staff, IT resources are a hot commodity, and this was basically a priority for nobody except me. It’s at that point I decided my approach would be to build a new tool myself, from scratch. By going to all that trouble though I was opening up a whole new world of opportunity, and why waste it by reinventing the wheel? I wanted a smarter approach. And I had one.

I gathered together a group of SMEs from the handful of teams that used the tool day in day out – the people that had their hands on it every day – and booked a full day in their calendars to go through a kaizen event. We spent the morning mapping current state processes on the wall, writing out steps on post-it notes as we went and sticking them up in the relevant places.

By the time our lunch arrived this was done, and what I already knew was now abundantly clear to everyone else in the room. Our process was built around the tool that IT had delivered to us, eleven years prior.

After lunch I ran through a five minute PowerPoint I’d put together about muda, and we began unceremoniously ripping post-its off the wall, eliminating wasteful steps from the process. By the time we were done we had a vastly simplified, lean process mapped out. The kaizen participants surprised me more than once, coming up with things I would never have thought of on my own, changing the order of steps to support their ideal workflow, and eliminating hand-offs that I had thought might be sacred cows.

The tool I’ve built is only subtly different from what I was envisioning before the kaizen, but those subtle differences add up to a huge impact, and that’s why I’m so proud of my work.

It would have been all too easy to skip the kaizen and work from the already documented, well established business processes we had in place. What we’d have ended up with is a tool that looked prettier than the one that came before it, functioned better, and supported our processes beautifully. I’m fairly sure everybody would have been pleased with the outcome, and nobody would have stopped to think about whether or not the business processes were right to begin with.

What we have instead is, I think, a game changer – at least within the scope in which the tool and processes operate. We have re-engineered, optimized, lean processes along with technology that supports them but doesn’t define them. Management are happy because we’ve eliminated waste they hadn’t realised was there, on a scale they hadn’t imagined. The staff are happy because they’re empowered. Not only do our new processes support that, eliminating hand-offs and re-work that were only included to begin with in order to check the output of a group of people who were already perfectly competent, but also because they now have processes and a piece of technology that were designed and defined for them, by them.

That’s why I do what I do, and that’s why I’m proud of my work.