Blog

Using JavaScript to Identify Whether a Server Exists

Recently, for reasons I’m sure I’ll write about in the
future, I needed to find a way to use JavaScript to test if either of two
web-locations are accessible – my home intranet (which would mean the user is on
my network), or the corporate intranet of the company for which I work (which
would mean the user is on my organization’s network). The page doing this test
is on the public web.

My solution for doing this test was simple. Since neither
resource is accessible publicly I put a small JavaScript file on each, then I
use AJAX and jQuery to try and fetch it. If
that’s successful, I know the user has access to whichever intranet site served
the request and my page can react accordingly.

If neither request is successful I don’t have to do
anything, but the user doesn’t see any errors unless they choose to take a look
in the browser console.

This all worked wonderfully until I enabled SSL on the page
that needs to run these tests, then it immediately fell apart.

Both requests fail, because a page served over HTTPS is
blocked from asynchronously fetching content over an insecure connection. Which
makes sense, but really throws a spanner into the works for me: neither my home
nor corporate intranet sites are available outside the confines of their safe
networks, so neither support HTTPS.

My first attempt at getting around this was to simply change
the URL prefix for each from http:// to https:// and see what happened. Neither
site supports that protocol, but is the error that comes back different for a
site which exists but can’t respond, vs. a site which doesn’t exist? It appears
so!

Sadly, my joy at having solved the problem was extremely
short lived. The browser can tell the difference and reports as much in the
console, but JavaScript doesn’t have access to the error reported in the
console. As far as my code was concerned, both scenario was still identical
with a HTTP response code of 0 and the status description worryingly generic “error.”

We are getting closer to the solution I landed on, however.
The next thing I tried was specifying the port in the URL. I used the https://
prefix to avoid the “mixed content” error, but appended :80 after the hostname
to specify a port that the server was actually listening on.

This was what I was looking for. Neither server is capable
of responding to a HTTPS request on port 80, but the server that doesn’t exist
immediately returns an error (with a status code of 0 and the generic “error”
as the descriptive text), but the server that is accessible simply doesn’t
respond. Eventually the request times out with a status code of 0 but a status
description, crucially, of “timeout.”

From that, I built my imperfect but somewhat workable
solution. I fire a request off to each address, both of which are going to
fail. One fails immediately which indicates the server doesn’t exist, and the
other times-out (which I can check for in my JavaScript), indicating that the
server exists and I can react accordingly.

It’s not a perfect solution. I set the timeout limit in my
code to five seconds, which means a “successful” result can’t possibly come
back in less time than that. I’d like to reduce that time, but when I
originally had it set at 2.5 seconds I was occasionally getting a
false-positive on my corporate network caused by, y’know, an actual timeout
from a request that took longer than that to return in an error state.

Nevertheless if you have a use-case like mine and you need
to test whether a server exists from the client perspective (i.e. the response
from doing the check server-side is irrelevant), I know of no other way. As for
me, I’m still on the lookout for a more elegant design. I’m next going to try
and figure out a reliable way to identify if the user is connected to my home
or corporate network based on their IP address. That way I can do a quick
server-side check and return an immediate result.

It’s good to have this to fall back on, though, and for now
at least it appears to be working.
Blog

CloudFlare Adds SSL To All Customers In Advance Of Google’s Focus On Security

I’ve written recently about SSL and how you can enable it on your website without spending a lot of (or even any) money. I’m a big fan of Cloudflare and their free service offering, and this feature just makes it better still.

CloudFlare Adds SSL To All Customers In Advance Of Google’s Focus On Security

Blog

Publicly Trusted SSL on the Cheap

Last week I wrote about how to create a self-signed SSL certificate for your website. It turned out to be one of my popular posts, and the process turned out to be remarkably easy: you run one single command, make a quick change to your webserver configuration and you’re done.

Our self-signed certificate worked great for encrypting the connection between our browser and the webserver, but as I mentioned that’s only half the SSL story. Our certificate wasn’t trusted by our operating system, which means it couldn’t be used by our browser to confirm the identity of the server we’d connected to, which in turns means that visitors to our website are greeted with a big, bold “your connection is not secure” error message.

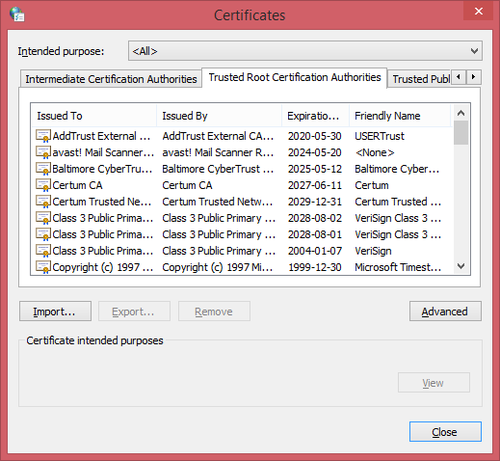
Our browser knows whether or not it can trust a given SSL certificate through a hierarchical structure. I’m glossing over some details, but essentially our operating system comes with a listed of trusted “root” certificates. The owners of these root certificates can produce certificates for their customers much as I produced one for myself last week. The difference is that there’s a mechanism for traceability here – the certificates they produce are trusted, because our browser can trace things back to the root certificate that it already knows to be good.

image

I’m not suggesting there’s some kind of conspiracy at play here, but it seems to me the owners of these root certificates have a metaphorical license to print money. They can create something out of nothing with, in essence, a single command, and sell it for a value they determine. I might be OK with that if they hadn’t determined that the value is so insanely high.

Luckily for us there are market forces at play in this whole story, and we don’t have to pony up the $1,500 Symantec are asking to secure our website traffic. We’re going to do it for free. Read on!

SSL Certificates and Their Value

Unfortunately, budget-minded certificate providers are few and far between, and the trend appears to be that their either disappearing or eliminating their lowest-cost options in favour of “better,” higher-priced ones. NameCheap is a good option if you’re looking to minimize costs, with certificates starting at around $10 at the time of writing.

But here’s the question: If you can get an SSL certificate from them for $10, why are Symantec charging $1,500. Is their option 150x better?

Here’s my answer: No.

Symantec would likely argue that point though, as you might imagine. They’d mention that they put their customers through a more stringent identification process in order to provide an increased level of confidence in their product. They know their customers, and they know they’re only issuing certificates to trustworthy sites. They’d argue they provide a warranty with their certificates that provides their customers with legal protection against a losses caused by a security breach.

This is all well and good, of course, but does the typical internet user care? I’d propose that the average site visitor – at best – notices the green padlock icon in the address bar and proceeds with confidence upon seeing it. How much you, as a site owner, pay to get that padlock icon really makes no difference to the vast majority of your visitors.

That all being said, it of course depends on what your site does. If you’re a bank, this is not an area you should be trying to save money in. Take the expensive certificate with the warranty and the legal protection. If you run an e-commerce site and your livelihood depends on your website then maybe don’t spend $1,500, but don’t accept the reputational risk of using a product with no warranty and limited support. If you’re me, though? Whatever, just spend as little money as possible.

Getting a Free SSL Certificate

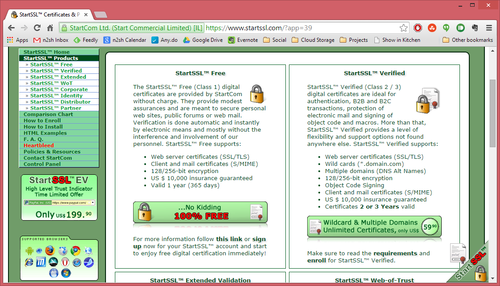
Enter our new best friends at StartSSL. They offer single-site SSL certificates for the extremely reasonable price of free. There are some caveats as you might expect, but none of them are a show-stopper for my purposes. Nevertheless the biggest thing you should consider is that although they’ll issue the certificate for free, you will have to pay if you ever need to revoke it. If you ever suffer a security breach and suspect that your certificate file has fallen into the wrong hands (I’m talking about the equivalent of the server.pem file we created for ourselves last week), it should be revoked to prevent some nefarious person setting up a site that masquerades as yours. If there’s ever another vulnerability similar to the heartbleed bug then the certificate should likewise be revoked.

In a nutshell, this is a risk tolerance question. By taking the free certificate you’re betting that nothing bad will happen during the 12-month life of your certificate or that if it does you’ll be prepared to accept a whole host of new risks.

Since I was OK with the many drawbacks of using a self-signed certificate, I laugh in the face of risks like the ones mentioned above. If you’re different then do your homework and make sure you’re getting a product that’s right for you, but if you’re like me then tune in next week when I walk through the steps of getting a free certificate issued to me and install it on my server.

image

Blog

Creating a Self-Signed SSL Certificate for Lighttpd

You’ve probably heard of SSL, or at least know it from either the https:// prefix that you see when browsing certain websites or the padlock icon in your browser’s address bar that goes along with it.

image

You probably also know that this icon’s presence is an absolute must when you’re doing sensitive things on the internet, like online banking. Really though you should consider it a must on any site where you’re entering information that you wouldn’t want falling into the wrong hands – including your username and password for the site itself and anything you do on the site once you have logged in.

SSL does two important things: It encrypts the connection between your browser and the site’s webserver, meaning that if somebody had the ability to listen in to your internet traffic (which is actually frighteningly easy, especially if you’re using a public WiFi hotspot) then they won’t actually see any of your important personal details. SSL also provides identity verification for websites in order to thwart a more complex attack where your web traffic is somehow redirected to a fake version of the site. Today we’re going to tackle only the first part – encrypting the connection between the browser and my webserver, which is running lighttpd.

Recently I’ve created a web interface that allows me access to my documents from anywhere on the web. To log in I have to enter my user ID and password for my home network, and once I’m logged in I may want to open a file that includes some sensitive information. This whole interaction is something that should be protected end to end by SSL, so that’s precisely what I’m going to do.

Creating an SSL Certificate

Of the two things SSL can do for us (securing a connection and confirming the identity of the webserver we’re connected to), the first part is actually much easier than you might think. The problem (as we’ll discover), is that doing only that first part has some problems that make it unsuitable for a typical public website. More on that later, but in my scenario where I have a website that’s intended only for my use this will be an acceptable solution, and that’s what we’re going to do.

On the webserver, navigate to a directory where you’re going to store the SSL certificate file. This directory should not be web-accessible. We’re going to use OpenSSL to create our SSL certificate. OpenSSL is unfortunately best known for introducing the heartbleed bug that caused a panic in the not too distant past, so before you proceed make sure the version you have is not affected. The step we’re about to complete actually won’t be impacted even if your server is vulnerable to heartbleed, but the day to day use of any certificate on a vulnerable server is not safe.

Ready? Good. Type the following command:

openssl req -new -x509 -keyout server.pem -out server.pem -days 365 –nodes

OpenSSL will ask a few questions, the answers of which will form a part of the certificate we’re generating (and be visible to site visitors, if they choose to go looking for it). Everything is fairly self-explanatory with the possible exception of the Common Name field. Since we’re going to be using this certificate for web-based SSL, the Common Name must be the hostname (the full domain name, including the www prefix if you use it) of your website.

Country Name (2 letter code) [AU]:CA
State or Province Name (full name) [Some-State]:Alberta
Locality Name (eg, city) []:Calgary
Organization Name (eg, company) [Internet Widgits Pty Ltd]:JnF.me
Organizational Unit Name (eg, section) []:Hosting and web services
Common Name (eg, YOUR name) []:www.ssl-example.jnf.me
Email Address []:[email protected]

You’ll find that you now have a file called server.pem in your working folder, and that’s it! This is your SSL certificate that will be used to secure the connection.

Enabling SSL in Lighttpd

Now we need to configure our webserver to use SSL with the certificate we’ve just generated. As I noted, my webserver is lighttpd. If you’re using Apache, IIS, Nginx or something else then the steps you need to follow will be different.

For lighttpd, open up your lighttpd.conf file (typically found in /etc/lighttpd) and adjust your configuration similar to the following:

$SERVER["socket"] == ":80" {
   url.redirect = ("^/(.*)" => "https://www.ssl-example.jnf.me/$1") 
}

$SERVER["socket"] == ":443" 
   ssl.engine = "enable"
   ssl.pemfile = "/path/to/server.pem"
   server.document-root = "/path/to/web-root"
}

The first section identifies any traffic that reaches port 80 on our webserver (http), and redirects the user to the https version of the site. The second section applies to traffic reaching port 443 (https), enables lighttpd’s SSL engine and provides the paths to the server.pem file that we generated, and the appropriate content.

Restart lighttpd for the changes to take effect:

sudo /etc/init.d/lighttpd restart

And that’s it! Traffic to our site is now encrypted using SSL.

Identity Verification

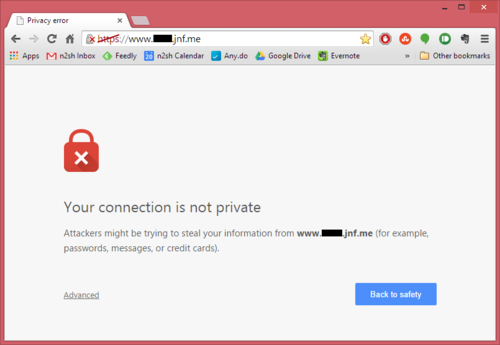
As I alluded to earlier in the article though, there’s a problem. When you navigate to the site in your browser you see (depending on your browser of choice) something similar to the following on your screen.

image

It’s not particularly specific, but clearly Chrome has an issue with our setup.

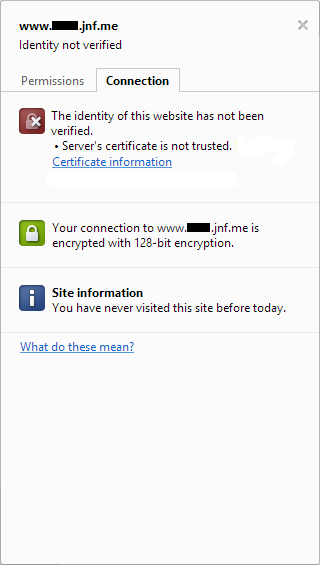
The problem here is the one I alluded to earlier, and if you click the padlock icon in the address bar then Chrome will give you some additional details that show you what I mean.

image

Our connection is indeed secured by SSL as we’d hoped, but Chrome has been unable to verify the identity of the website we’re connecting to. This is not a surprise – since we created the SSL certificate ourselves, our browser has no means of knowing if the certificate should be trusted or not. This is why self-signed certificates are not suitable for public, production websites.

Since this is site is going to me for my use only, I can live with it. The important thing is that my connection is encrypted, and if I hit the Advanced link then I have an option to ignore the warnings and proceed to the site. I don’t want to do that every time if I can avoid it though, and the solution is to add the site’s SSL certificate to your computer’s Trusted Root Certificate Authorities store. Chrome (on Windows) and Internet Explorer both use this same location when checking the validity of SSL certificates, so the easiest way to go about doing this is actually to open the site in Internet Explorer and then complete the following steps which I took from a helpful user on stackoverflow:

  1. Browse to the site whose certificate you want to trust.
  2. When told There is a problem with this website’s security certificate, choose Continue to this website (not recommended).
  3. Click on Certificate Error at the right of the address bar and select View certificates.
  4. Click on Install Certificate… then in the wizard, click Next.
  5. On the next page select Place all certificates in the following store.
  6. Click Browse, select Trusted Root Certification Authorities, and click OK.
  7. Back in the wizard, click Next, then Finish.
  8. If you get a security warning message box, click Yes.
  9. Dismiss the message box with OK.
  10. Restart your computer.
  11. When you return to the site in either internet explorer or Chrome, you should find that the certificate is now trusted.

All done!