Blog

New Nerdy Project: Inky Impression Picture Frame

The other day (coincidentally, on Pi Day) I posted on Mastodon about picking up some new Raspberry Pi and accessories for a couple of new projects.

Well, this is the first one! I’ve constructed an e-ink picture frame.

Over on YouTube, AKZ Dev has recently posted a few videos about the hardware I’m using: a 7.3″ e-ink display from Pimoroni called the Inky Impression.

He’s also been writing some python software to power it, and while I’m sure what he’s created is great the point of this project for me is as a learning exercise, so I’ll be writing my own code.

Hardware

First of all though, I had to assemble the hardware. This is pretty straight-forward:

I may still get a wooden picture frame to put this in for better aesthetics, but for now my 3D printed version is working great. You put the Pi into its 3D printed case, the display into its 3D printed case, and then you plug them together and give it some power. Done!

I wish that the colours on the display were a little more vibrant than they are (this aspect of the display is not quite as good as I was expecting it to be) and I wish it updated a little more quickly (this is exactly as I expected it to be, and it takes about 30 seconds), but on the whole I like this e-ink display much more than I like backlit LCD photo frames.

Software

I downloaded my new favourite OS for the Raspberry Pi, DietPi, as a base and let it guide me through the setup process to connect to WiFi, set the timezone, the usual stuff. A couple of particular options to pay attention to during setup were to enable I2C and SPI, which is how the Pi communicates with the screen through the GPIO header, and install a NodeJS environment which I did simply by selecting it from the DietPi software installer.

Pimoroni suggests Python as the language to use and offers a Python library for that purpose, but I have limited experience in Python and I’m much more comfortable with Node, so that’s what I’m going to use if I can.

As a proof of concept, I wrote a half-dozen lines of code that take an input image, resize and crop it to fit the display, and render it on the screen. I’m using the sharp library for the image manipulation, and the inky library from aeroniemi to interact with the display.

const sharp = require('sharp')
const inky = require('@aeroniemi/inky')
const frame = new inky.Impression73()
sharp('../img/OriginalImage.jpg')
  .resize(800, 480)
  .toFile('output.png', (err, info) => {
	frame.display_png('output.png')
	frame.show()
})

So far this is working great. I obviously plan to extend this, and I’ll make the eventual code available if anyone else wants to replicate what I’ve done. Features I’m currently thinking about are:

  • Connect to a specific album in my Google Photos account
  • Rotate through the images in the album, updating every five minutes or so
  • Ability to skip forward and back using the buttons on the side of the display, maybe
  • Ability to skip forward and back by issuing a command over MQTT (of course I’m integrating this thing with Home Assistant)
  • Ability to display some specific content (other than the usual album) based on an MQTT command or button press… what I’m thinking of here is my WiFi username and password that I can interrupt the slideshow to display for guests along with a QR code with the connection details
  • Maybe the ability to display a webpage by loading it headlessly and taking a screenshot (I believe AKZ Dev’s software can do this and it seems like it opens up lots of possibilities)
  • Maybe a REST API in case I want to use that rather than MQTT

This’ll all take me some time and I’m not in a rush, but I’ll post more as I work on it!
Shrapnel

Earlier in the week I wrote a blog post about how I set up my Office display using a Raspberry Pi 3B+

Today I picked up a Pi 4 and a Pi Zero 2 W for other projects (watch this space!) and I was curious how they’d perform. So I raced them. From the time I press the “power on” button on my TV remote to the time they’re displaying a webpage.

DeviceTime
Raspberry Pi 3B+1:05
Raspberry Pi Zero 2 W1:25 (+20 secs)
Raspberry Pi 4B (4gb)0:49 (-16 secs)

This is not super-scientific. I think the 3B+ is usually faster except it took longer than usual to obtain an IP address during its boot process. 🤷🏻‍♂️

What was most interesting to me was the differences between the 3B+ and the Zero 2W: the initial parts of the Zero’s boot process were quicker than the 3B+, but as soon as it got into dealing with graphics and opening the browser it slowed down dramatically. Even changing from one screen to another in my dashboard and reloading page elements were slow enough that I would need to change my dashboard layout. It really wasn’t performant enough for what I’m doing.

The Pi 4, unsurprisingly, performed great – although the difference between the 3B+ and the 4 wasn’t as big as I thought it would be. The Pi 4 is also too power hungry to be powered by my TV’s USB port, which is a really nice feature of my setup.

Whether by luck or judgement, the setup I have is the one I’d recommend if you want to do something similar. I’m almost tempted to buy more Pi 3s in case I want to replicate it somewhere else in the house.

Shrapnel

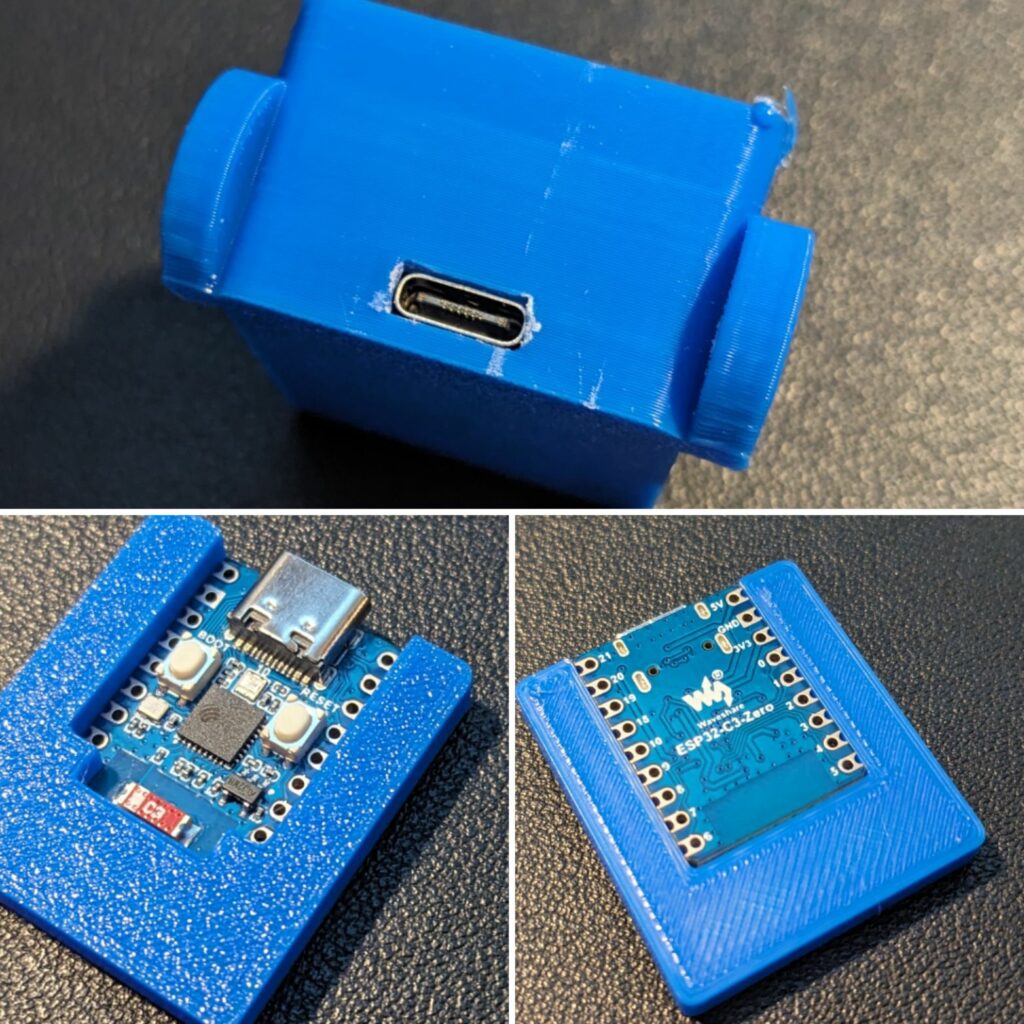
…and another update – I’ve made the u-shaped bracket for the microcontroller that I talked about in my post yesterday.

I originally thought I’d need to adjust the hole in the garbage can model to move it upward, but actually the key was putting the microcontroller into the bin with the port facing down.

It does need to be very slightly wider than it currently is, but on my test piece I did that a file and it’s looking good!

Shrapnel

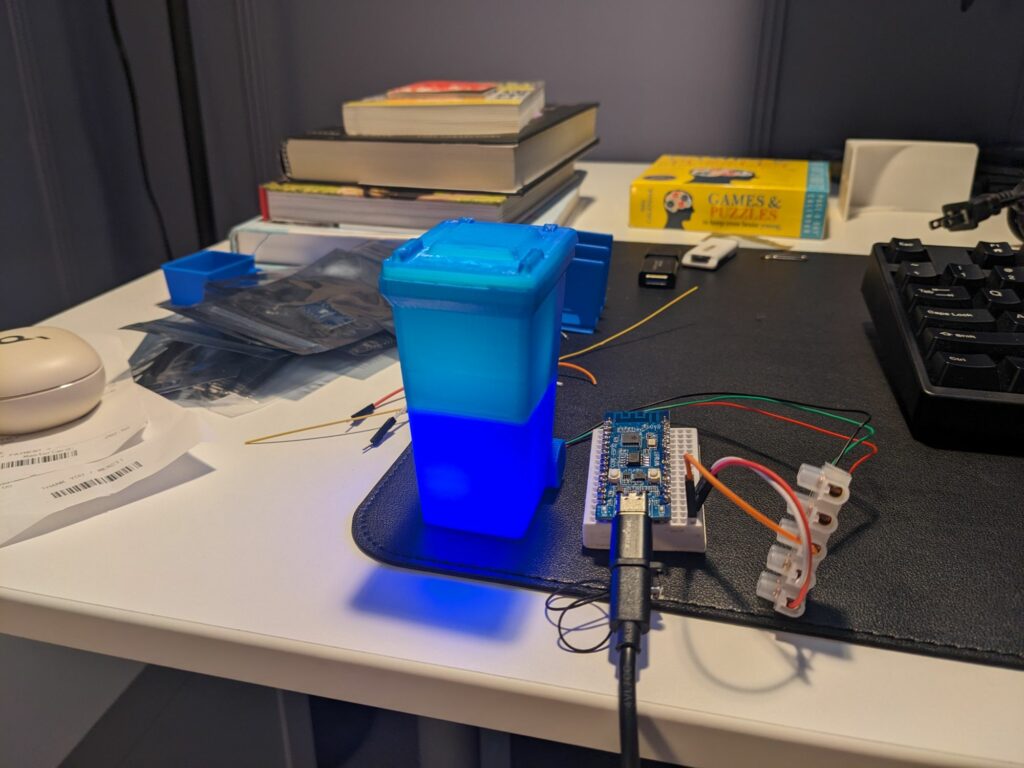
Prototype is alive!

I was worried that only having two LEDs instead of four would result in it not being bright enough, but I’m running it at half brightness with my example code and it seems great.

Next steps are to find a way to fit the tiny microcontroller I’m going to use into the bottom so the USB port lines up for power, and of course print the bin in white.

Blog

Making My Own Bindicator

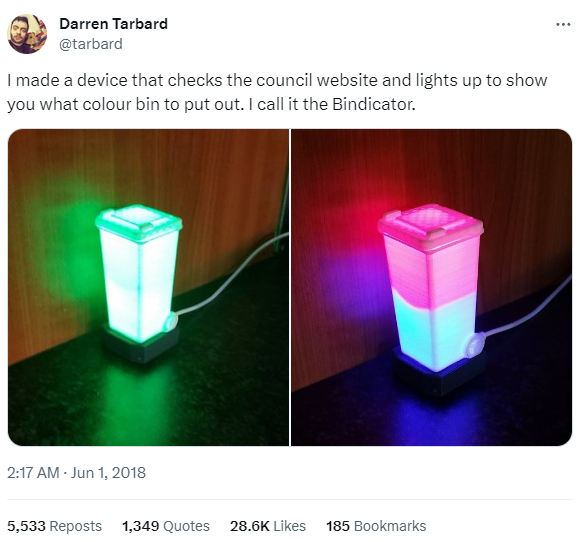
Somewhere around five years ago I saw a semi-viral tweet, and was immediately inspired.

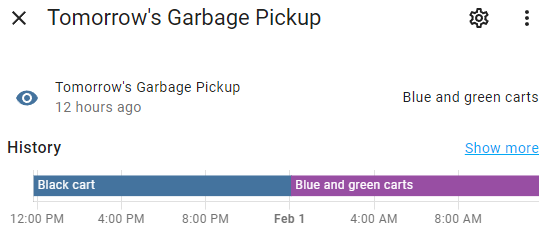
In some ways I’ve been thinking about the ever since. I’ve always loved electronics projects but I didn’t have the capabilities to make a bindicator of my own back then, so I started with the software: the City of Calgary makes their garbage schedule available in iCal format through an API and I’d been subscribed to it via Google Calendar for some time. It wasn’t a difficult task to write a little bit of code to create a sensor in @[email protected] that tells me which carts need to go out that day, and from there it’s even more trivial to craft an automation that sends us each a notification at 7pm the evening before the garbage needs to go out.

This is nice and all, but the idea of a bindacator of my own never really went away, and now that I can do my own , now’s the time!

There are plenty of articles online about how to make this and the original creator has two-part YouTube series that walks us all through it, so I think it might be the perfect first project for combining my new 3D printing capabilities with my aforementioned affinity for little electronics projects.

I don’t 100% know where to start because the microcontroller that I’ve ordered isn’t the exact same one used in the original build, and rather than four individual LEDs my plan is to simply use four LEDs from the end of a spare light strip I have lying around and I’m not certain whether these will fit nicely into the existing 3D model or whether it’ll need some modification to make everything fit (and if it needs modifying – I don’t know yet how to do that).

So in the absence of a solid plan I’ve opted to get started by getting started. As I write this the 3D model is printing in the other room and @[email protected] tells me it has an hour to go. I don’t know that this will be a quick project because I expect to learn a lot as I go, but I will keep you all up to date on how I get on!

Shrapnel

How I Combined an Ultrawide and Portable Monitor for a Kickass Dual-Display Setup

I’ve been considering getting an ultrawide monitor but I’m reluctant to pull the trigger because I’m not sure it’s going to give me the screen real estate that I want.

Right now I have two 16:9 monitors which is more than I need and I’d like a bit of desk space back, but I’m not convinced 21:9 is enough. 24:9 is what I think I want but that’s not actually a thing.

This may just be the perfect solution.

Source